
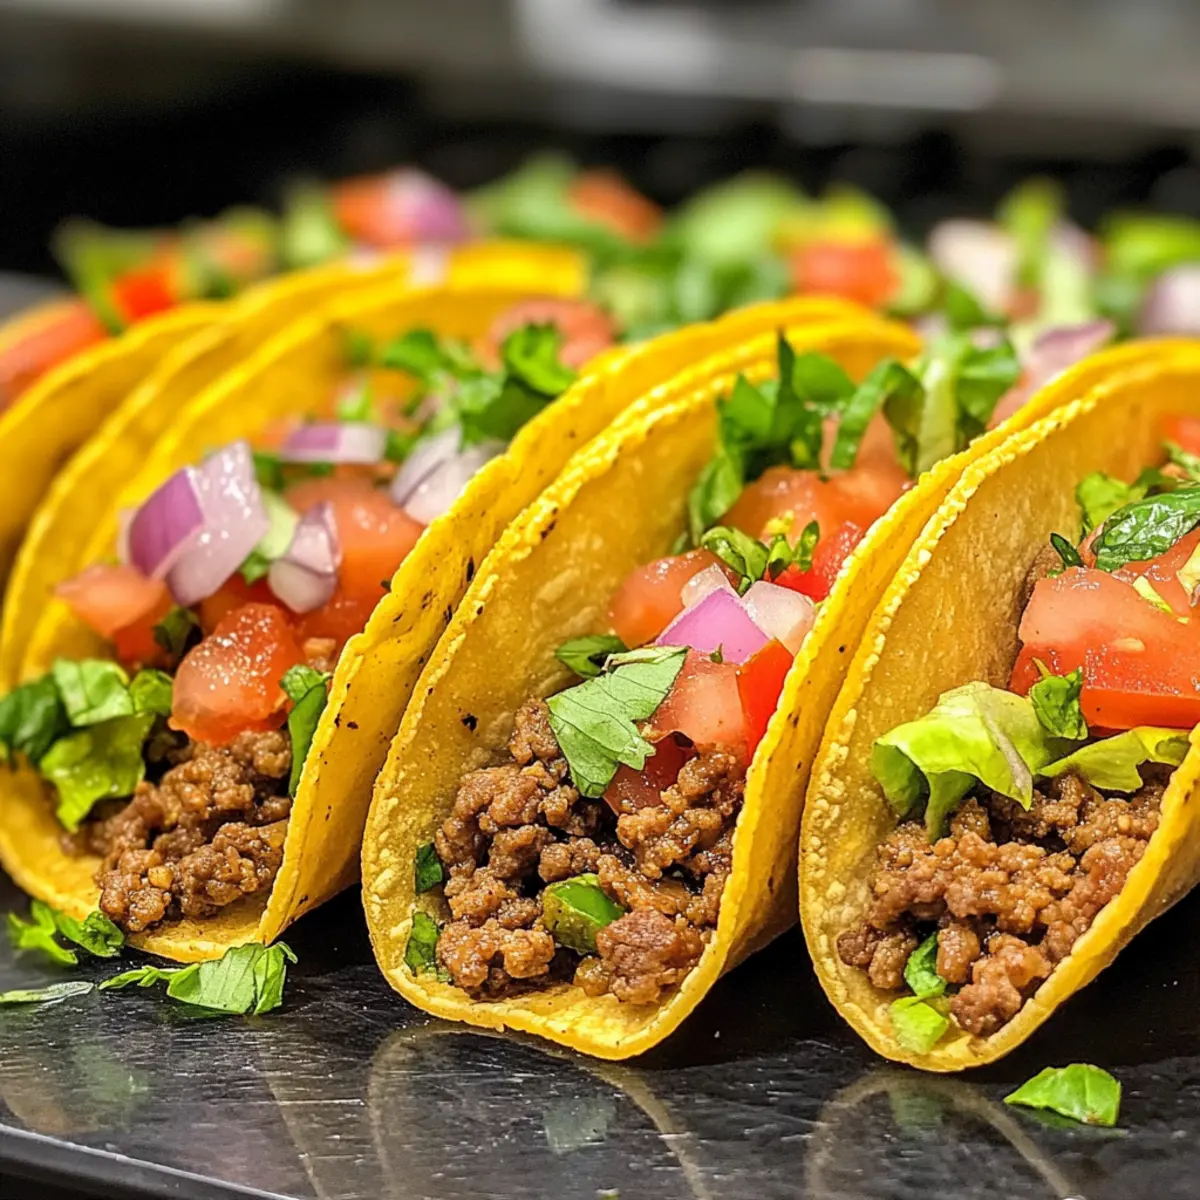
There’s something truly magical about crispy taco shells filled to the brim with savory goodness. My Oven-Baked Cheesy Tacos turn a simple weeknight dinner into a delightful feast that’s ready in just 30 minutes! The best part? You can easily swap out the protein—whether you crave ground beef, turkey, or even lentils for a plant-based twist, this recipe adapts to your needs. With every bite, you get the satisfying crunch of baked shells paired with a melty cheese finish that warms the heart. Plus, assembling these loaded tacos allows for a fun kitchen moment with family or friends. Are you ready to dive into this cheesy goodness and explore endless topping possibilities? Let’s get cooking!
Why are Oven-Baked Cheesy Tacos a must-try?
Quick and Easy: This recipe is a lifesaver for busy weeknights, taking just 30 minutes from kitchen to table.
Flexibility: With multiple protein options like ground beef, turkey, or lentils, you can create a delicious taco tailored to your tastes.
Fun to Assemble: Gather family or friends and enjoy a delightful time customizing your tacos with fresh toppings.
Crispy Delight: Baking the tacos ensures a crunchy texture while the gooey cheese melts perfectly over the filling.
Crowd-Pleaser: Whether you’re serving a family or hosting friends, these tasty tacos are sure to impress everyone!
Don’t forget to explore variations to suit your preferences—check out my post for other easy weeknight dinner ideas!
Oven-Baked Cheesy Tacos Ingredients
For the Filling
• Ground Beef – The main star that delivers a hearty flavor; swap with ground turkey or plant-based proteins for a lighter twist.
• Taco Seasoning – Essential for that bold and zesty flavor; use a homemade mix for a personalized touch.
• Tomato Sauce/Salsa – Adds moisture and a tangy bite; keep it mild or spicy depending on your preference.
For Assembly
• Shredded Cheese – Melts beautifully to create that gooey goodness; use any cheese you love, like cheddar or Monterey Jack.
• Hard Taco Shells – Choose sturdy shells that hold up well in the oven for the ultimate crunch.
For Fresh Toppings
• Fresh Vegetables (Lettuce, Tomatoes, Red Onion) – These bring freshness and color to your tacos; customize with your favorites for added crunch.
• Sour Cream or Guacamole – Serve on the side for a creamy dip that elevates each bite of your Oven-Baked Cheesy Tacos!
Step‑by‑Step Instructions for Oven-Baked Cheesy Tacos
Step 1: Preheat the Oven
Begin by preheating your oven to 400°F (200°C). This temperature is essential for achieving crispy taco shells and perfectly melted cheese. While the oven heats up, gather all your ingredients to make the cooking process smooth and enjoyable.
Step 2: Arrange Taco Shells
Carefully arrange the hard taco shells upright in a baking dish. This step not only keeps them stable but also ensures that each shell gets evenly filled and baked. It’s visually satisfying to see the shells lined up, ready to hold all the flavorful goodness of your Oven-Baked Cheesy Tacos.
Step 3: Cook the Beef Mixture
In a medium skillet over medium heat, brown the ground beef along with diced onion. Stir frequently for about 5–7 minutes until the meat is fully cooked and browned, and the onions are translucent. Drain any excess fat to keep your filling lean and flavorful, setting the stage for your delicious tacos.
Step 4: Add Seasoning
Once the beef and onions are cooked, stir in minced garlic and taco seasoning. Cook for an additional minute, allowing the fragrant spices to awaken and coat the beef thoroughly. This step adds depth of flavor to your filling, making each bite of your Oven-Baked Cheesy Tacos a treat for the senses.
Step 5: Incorporate Tomato Sauce
Next, pour in your tomato sauce or salsa, stirring gently to combine. Allow the mixture to simmer for about 5 minutes, letting the flavors meld together beautifully. The filling should be slightly thickened and aromatic, creating a tempting base for your tacos.
Step 6: Fill the Taco Shells
Now it’s time to assemble! Spoon the savory meat mixture generously into each taco shell, filling them about three-quarters full. Don’t overfill; you want the shells to stand up securely and showcase the scrumptious ingredients, setting your Oven-Baked Cheesy Tacos up for success.
Step 7: Top with Cheese
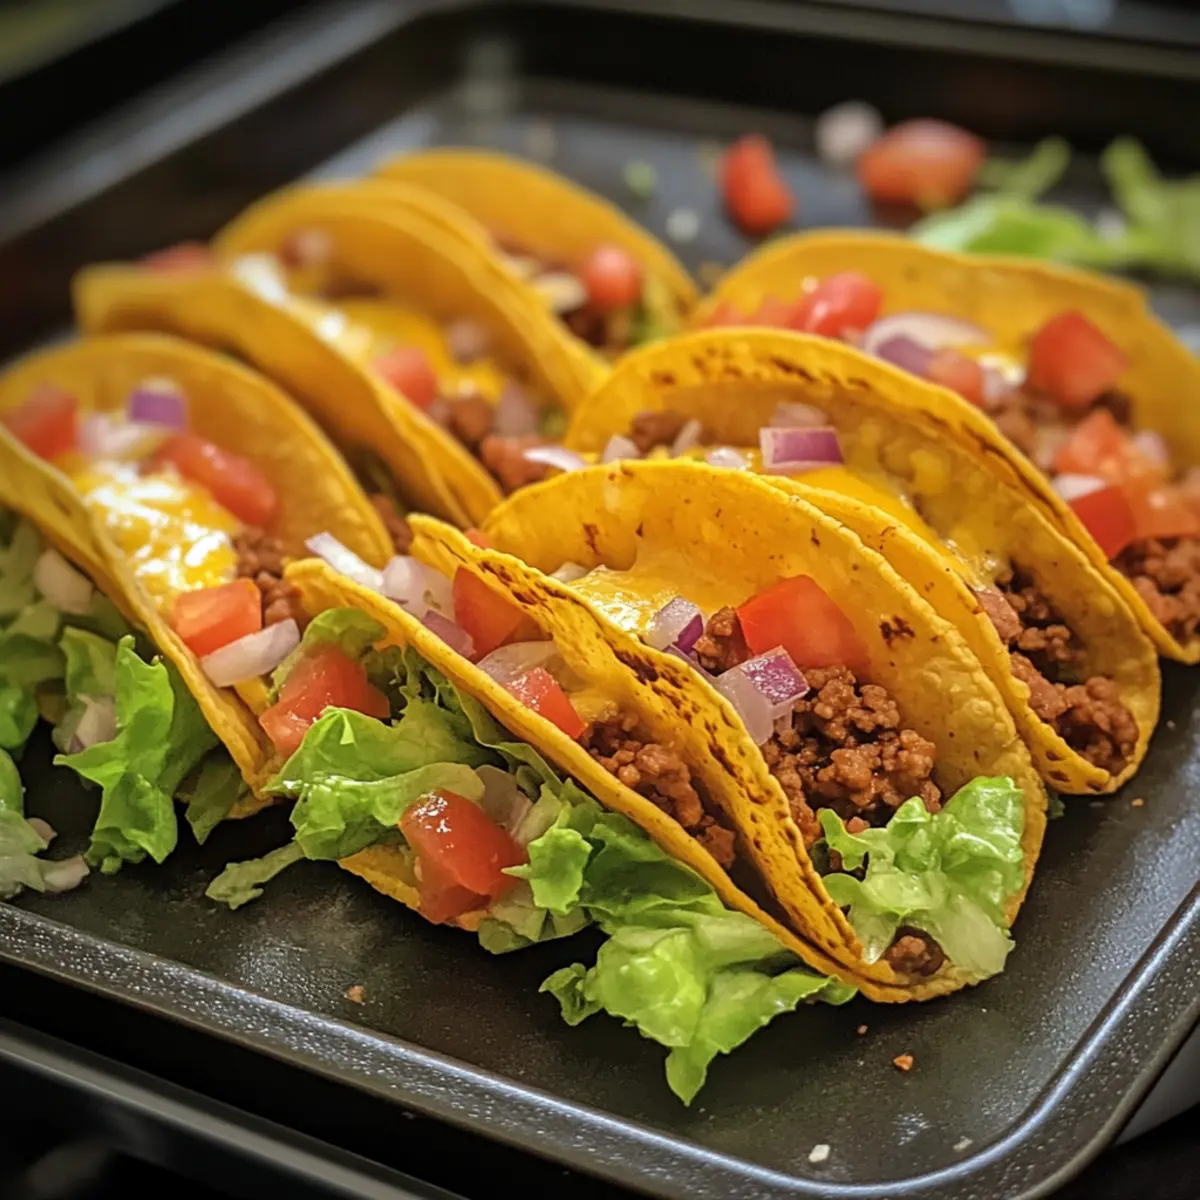
Sprinkle a generous layer of shredded cheese over the filled taco shells. The cheese will melt and create a gooey texture that ties all the flavors together. Be sure to cover each taco well, as this melty layer brings joy with every bite.
Step 8: Bake to Perfection
Carefully place the baking dish in the preheated oven and bake for 10-15 minutes. Keep an eye on them; your Oven-Baked Cheesy Tacos are ready when the cheese is bubbly and the taco shells have turned a golden brown, creating an irresistible crunch.
Step 9: Add Fresh Toppings
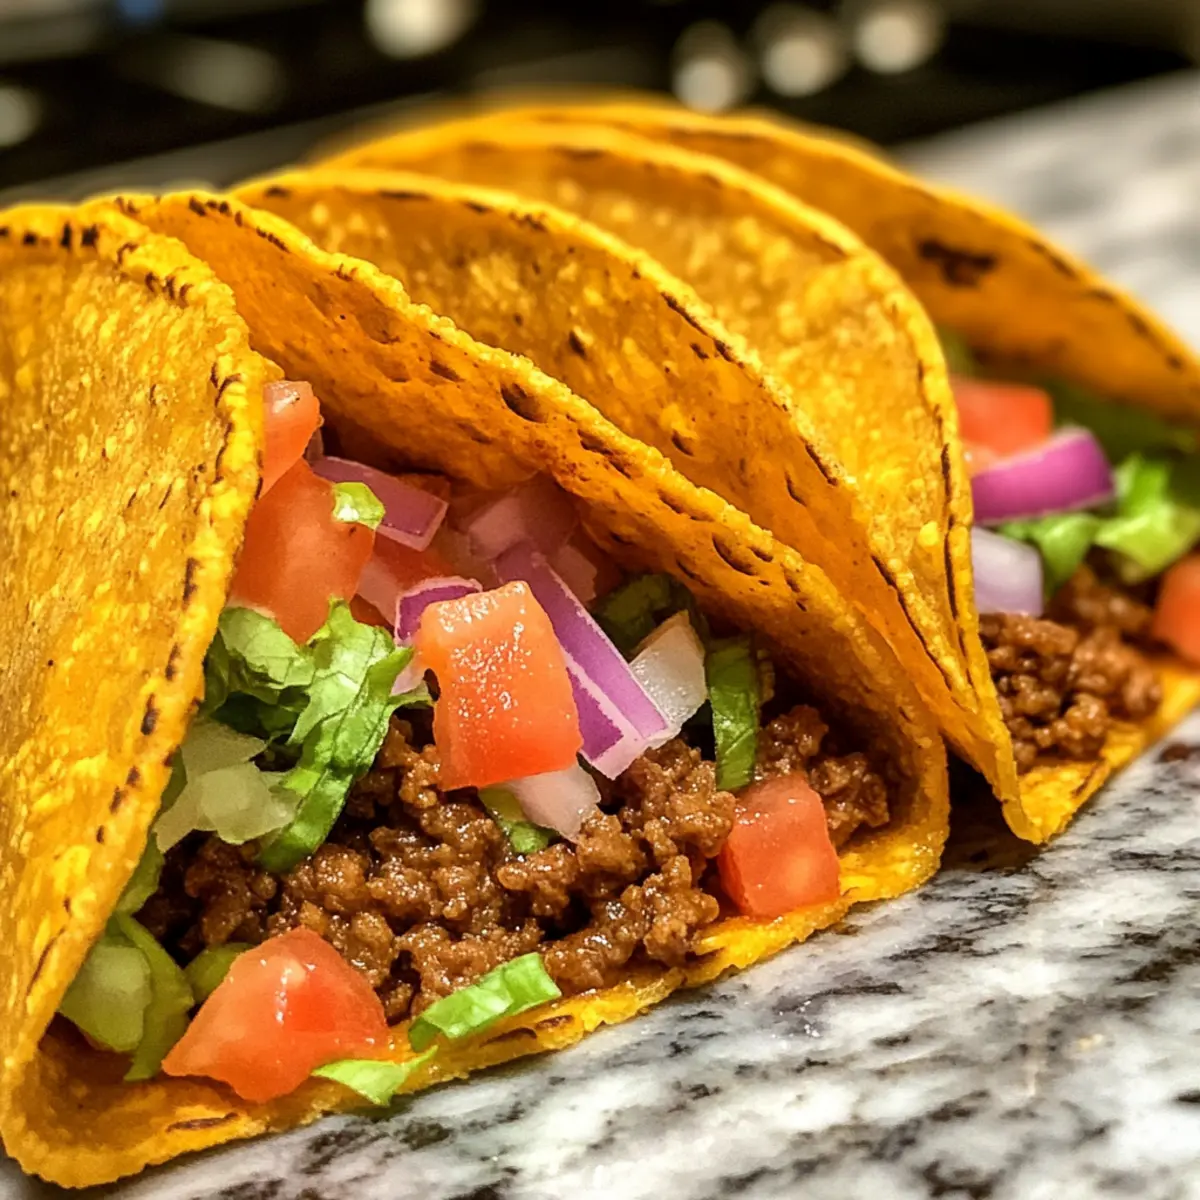
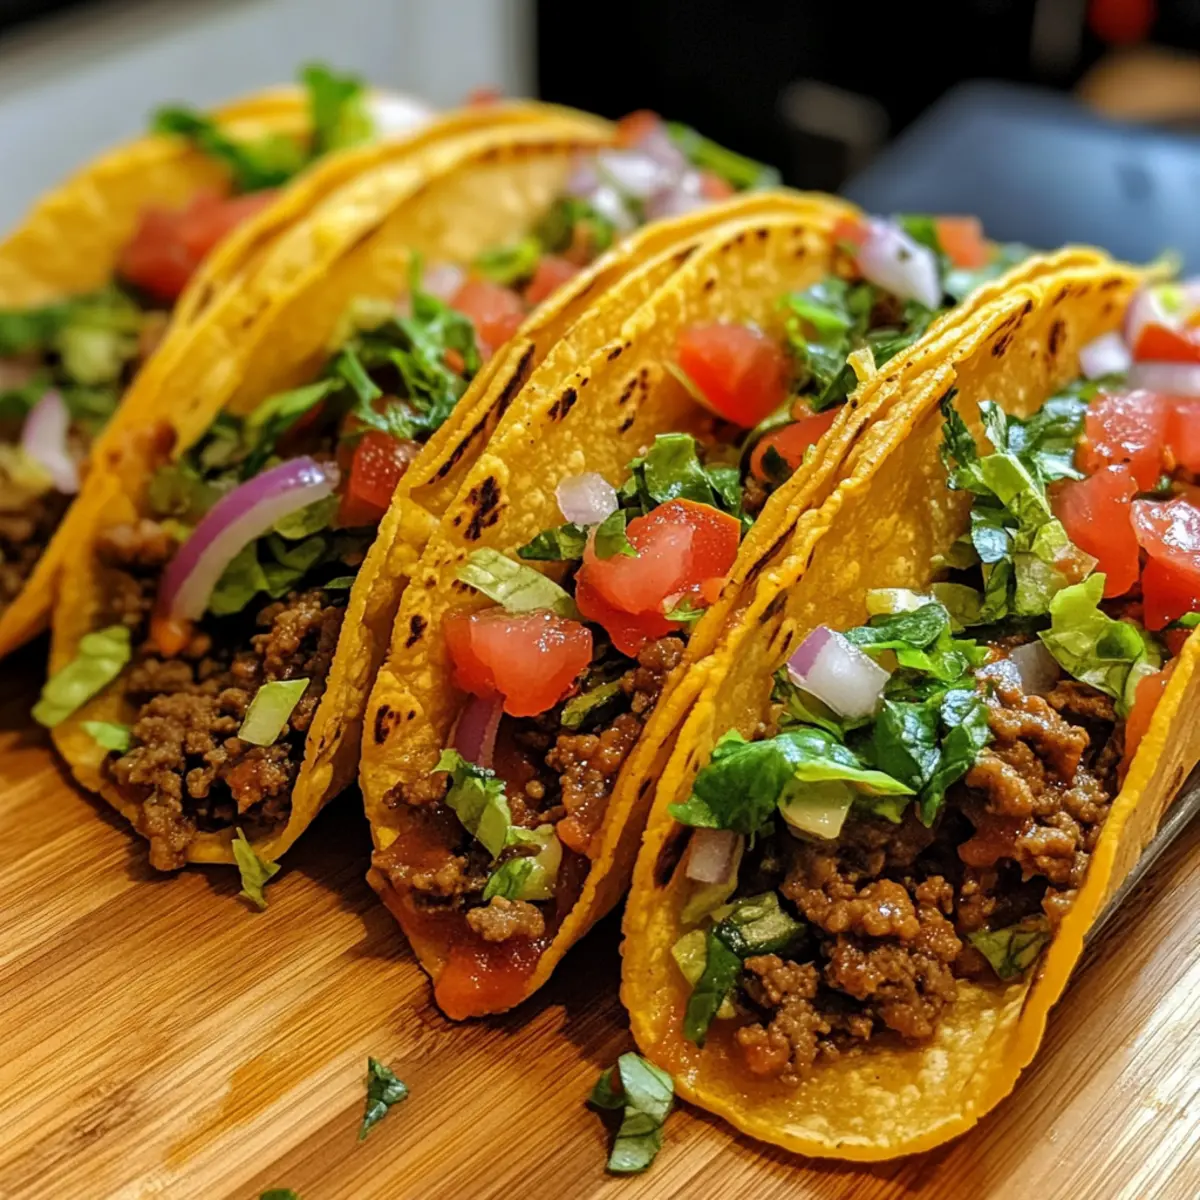
Once baked, remove the dish from the oven and let it cool for a minute. Top your crispy tacos with fresh ingredients like shredded lettuce, diced tomatoes, and sliced red onion for added color and crunch. Exploring different toppings will truly elevate your taco experience.
Step 10: Serve Warm
Serve the Oven-Baked Cheesy Tacos warm and watch as everyone gathers around the table! Pair with sour cream or guacamole on the side to enhance the flavors. This fun and delicious dish is perfect for sharing, bringing smiles and satisfaction to family and friends alike.
What to Serve with Oven-Baked Cheesy Tacos
Bring your family around the table and watch smiles grow as these delightful tacos steal the show, perfectly paired with vibrant sides and refreshing drinks.
-
Creamy Guacamole: This fresh dip adds a smooth, rich dimension that complements the crunchy tacos beautifully while enhancing each bite with flavor.
-
Mexican Street Corn Salad: A zesty mix of grilled corn, lime, and chili powder adds a sweet contrast that balances the savory tacos’ flavors.
-
Crispy Tortilla Chips: Serve with salsa for a crunchy appetizer that echoes the crispy nature of the tacos, creating a harmonious snack experience.
-
Fresh Cilantro Lime Rice: This fragrant rice dish brightens the meal with citrus notes that pair wonderfully with the seasoned fillings and creamy toppings.
-
Chilled Agua Fresca: A refreshing fruit drink like watermelon or cucumber quenches thirst and brings a light sweetness that complements the savory and spicy notes of the tacos.
-
Classic Black Bean Salad: Packed with protein and fresh ingredients, this salad not only adds color to the platter but also enhances the meal’s nutritional value.
-
Churros for Dessert: End the meal on a sweet note with these crispy, cinnamon-sugar-coated treats, perfect for dipping in chocolate sauce.
-
Tropical Fruit Salsa: A blend of fresh mango, pineapple, and jalapeños adds a sweet-and-spicy finish that brightens the palate after the rich tacos.
Oven-Baked Cheesy Tacos Variations & Substitutions
Feel free to get creative with these tasty swaps and twists that make this recipe truly your own.
-
Dairy-Free: Substitute shredded cheese with a plant-based cheese alternative for a completely dairy-free version that melts beautifully.
Choosing a delicious, dairy-free cheese means everyone can enjoy this comfort food without compromise. -
Plant-Based Protein: Use black beans or lentils instead of beef for a hearty vegetarian option that’s full of flavor.
Both options provide a protein-rich filling while letting in all the spices. Black beans add a creamy texture, while lentils give a nutty vibe that’s sure to please. -
Spicy Kick: Add diced jalapeños into the beef mixture or as a topping for a fiery twist that elevates the flavor profile!
Just the right amount brings warmth, enticing heat without overwhelming the dish. You can adjust the spice level to fit everyone’s palate. -
Cheesy Double: Mix two types of cheese—like pepper jack and cheddar—for a combination that delights the senses with flavor and texture.
This cheese fusion opens up a whole new world of cheesy goodness that makes every bite extra special. -
Seasonal Veggies: Toss in seasonal vegetables like bell peppers or zucchini into the beef mixture for added color, crunch, and nutrition.
Enhancing your tacos with these fresh veggies offers an extra layer of deliciousness while sneaking in some healthy goodness. -
Gluten-Free: Swap hard taco shells for gluten-free corn tortillas, ensuring everyone can indulge in this crunchy delight.
Checking labels makes finding the perfect shell easy and allows you to enjoy all that crispy yumminess without worry! -
Sweet Twist: Top with a spoonful of corn salsa or mango salsa for a sweet-and-savory experience that dances on the palate.
This unexpected topping adds a bright, zesty flavor that pairs beautifully with savory elements, creating a fiesta in every bite! -
Make-Ahead Magic: Prepare the beef filling in advance and freeze it, saving you time on busy nights. Just fill and bake when you’re ready!
This little hack transforms dinner prep—just think of those cozy taco nights ready in a snap!
Make Ahead Options
These Oven-Baked Cheesy Tacos are perfect for meal prep enthusiasts looking to save time during busy weeknights! You can prepare the flavorful beef mixture up to 3 days in advance by cooking it completely, then refrigerating it in an airtight container. Additionally, you can fill the taco shells just before baking, keeping them crisp and preventing sogginess. When ready to serve, simply preheat your oven, assemble the tacos if you haven’t already, and bake them for 10-15 minutes until the cheese is bubbly and the shells are golden. This way, you can enjoy restaurant-quality tacos with minimal effort, ensuring they’re just as delicious as when freshly made!
Expert Tips for Oven-Baked Cheesy Tacos
• Crispiness Count: Ensure your taco shells are sturdy enough to hold all the fillings without breaking during baking.
• Meat Mixture Prep: For a quicker dinner, prepare and refrigerate the beef mixture in advance; fill the shells just before baking.
• Oven Check: Always preheat the oven fully before placing your tacos inside. This guarantees even baking and perfect crispiness.
• Fill Smartly: Avoid overfilling your taco shells; filling them about three-quarters allows them to cook evenly and maintain their structure.
• Cheese Choices: Experiment with different cheese types for diverse flavors—try pepper jack for a spicy kick or a vegan cheese for a plant-based option.
• Topping Variation: Customize your toppings based on your mood! Try adding pickled jalapeños for heat or corn for sweetness alongside your fresh veggies.
How to Store and Freeze Oven-Baked Cheesy Tacos
Fridge: Store leftovers in an airtight container for up to 3 days. Reheat gently in the oven at 350°F (175°C) to maintain that delightful crunch.
Freezer: Assemble unbaked tacos and wrap them tightly in plastic wrap, then aluminum foil. They can be frozen for up to 2 months—just bake directly from the freezer!
Make-Ahead: Prepare the beef mixture in advance, refrigerating it separately. Fill taco shells just before baking to save time on busy nights.
Reheating: For a quick meal, reheat in the oven or air fryer for a crispy finish. The goal is to keep those Oven-Baked Cheesy Tacos delicious and satisfying!
Oven-Baked Cheesy Tacos Recipe FAQs
How do I choose ripe ingredients for my Oven-Baked Cheesy Tacos?
Absolutely! For fresh toppings like tomatoes and lettuce, look for bright colors and firm textures. Choose tomatoes without dark spots and lettuce with crisp leaves. If you’re using avocados for guacamole, they should yield slightly to pressure but not be overly mushy.
What’s the best way to store leftover Oven-Baked Cheesy Tacos?
You can store leftovers in an airtight container for up to 3 days in the fridge. If you want to keep them as crispy as possible, I recommend reheating them in the oven at 350°F (175°C) for about 10 minutes. That way, you’ll revive that delicious crunch.
Can I freeze unbaked Oven-Baked Cheesy Tacos?
Yes! To freeze, assemble unbaked tacos and wrap them tightly in plastic wrap followed by aluminum foil. This will protect them from freezer burn. You can freeze them for up to 2 months. When you’re ready to enjoy them, bake directly from the freezer, adding an extra 5-10 minutes to the baking time.
What should I do if my tacos are falling apart during baking?
If your tacos are breaking apart, it’s usually due to overfilling or using shells that aren’t sturdy enough. Make sure you fill them about three-quarters full and choose high-quality taco shells that can withstand oven heat. If they still break, try baking them in a taco holder or upright in a muffin tin for added support.
Are Oven-Baked Cheesy Tacos suitable for my gluten-free diet?
Certainly! You can easily make these tacos gluten-free by using certified gluten-free taco shells. For the filling, be mindful of your taco seasoning—some pre-packaged mixes contain gluten. You can also create your own seasoning blend using spices like cumin, chili powder, and paprika for a gluten-free alternative.
Can I prepare the beef mixture ahead of time?
Absolutely! To save time on busy nights, cook and refrigerate the beef mixture in advance. When you’re ready to bake, simply fill the taco shells with the mixture and top with cheese. This will cut your prep time significantly while still offering a hot, homemade dinner in a flash!
Oven-Baked Cheesy Tacos: Crispy Comfort in Every Bite
Ingredients
Equipment
Method
- Preheat your oven to 400°F (200°C).
- Arrange the hard taco shells upright in a baking dish.
- In a medium skillet over medium heat, brown the ground beef and diced onion for about 5–7 minutes until cooked and translucent.
- Stir in minced garlic and taco seasoning; cook for an additional minute.
- Pour in your tomato sauce or salsa, stirring gently. Simmer for about 5 minutes.
- Spoon the meat mixture into each taco shell, filling about three-quarters full.
- Sprinkle shredded cheese over the filled taco shells.
- Bake for 10-15 minutes until cheese is bubbly and shells are golden brown.
- Top with fresh vegetables like lettuce, tomatoes, and red onion.
- Serve warm with sour cream or guacamole on the side.
Leave a Reply