
The incredible aroma of sizzling dough hits me as I pull my freshly made Flaky Roti Canai from the pan. This versatile flatbread is not just a recipe; it’s a gateway to countless culinary adventures, perfectly suited for breakfast, lunch, or dinner. Crafted with simple ingredients, this recipe offers not only a delightful, tender texture but also the satisfying experience of layering that sets it apart from everyday bread. Plus, it’s an easy way to impress family and friends, making it the ultimate comfort food that feels both indulgent and homemade. Whether enjoyed crisp alongside your favorite curry or simply rolled up with some sweetened condensed milk, you won’t be able to resist its charm. Ready to transform your cooking routine with this flaky delicacy? Let’s dive in!

Why is Roti Canai So Irresistible?
Flaky Layers: Nothing beats the satisfaction of pulling apart those perfect layers of roti.
Comforting and Versatile: Enjoy this flatbread with a variety of dishes, be it spiced curries or sweet treats. You won’t be bored!
Easy-to-Make: With simple ingredients and straightforward steps, this recipe is perfect for both seasoned chefs and home cooks.
Crowd-Pleaser: Serve it at gatherings, and watch as it quickly disappears! Pair it with a delightful Coconut Chia Pudding or a hearty Crab Rangoon Dip for the ultimate experience.
Make-Ahead Friendly: Prep a batch in advance and savor the deliciousness whenever cravings strike. Enjoy a simple, satisfying meal without the hassle!
Flaky Roti Canai Ingredients
• Discover the magic behind the Flaky Roti Canai Recipe with these essential ingredients.
For the Dough
- All-purpose flour – Provides structure and chewiness to the roti. Note: Measuring by weight gives the best texture.
- Sea salt – Enhances flavor and strengthens gluten formation. Substitution: Table salt can be used if needed.
- Boiling water – Activates the flour, helping create a soft dough. Important: Using hot water aids in gluten development.
- Room temperature water – Adds moisture for a manageable dough consistency. Quantity may vary based on flour absorption.
- Oil – Coats the dough layers, adding flavor and promoting flakiness during cooking. Substitution: Ghee or softened butter work wonderfully for added richness.
Optional Flavors
- Chopped herbs or spices – Adding finely chopped herbs or spices can offer a unique flavor twist to your roti.
- Stuffing ingredients – Consider using vegetables, meat, or cheese for delicious stuffed variations before folding.
Step‑by‑Step Instructions for Flaky Roti Canai Recipe
Step 1: Combine Flour and Water
In a large mixing bowl, combine all-purpose flour and sea salt, ensuring even distribution. Gradually pour in boiling water while stirring with a fork or wooden spoon, until clumps begin to form. This process activates the flour and creates the foundation for your Flaky Roti Canai.
Step 2: Form the Dough
Once clumps form, add room temperature water a little at a time, mixing until you achieve a soft, scraggly dough. The dough should be slightly tacky but not sticky. Once mixed, cover it with a damp cloth and let it rest for 30 minutes, allowing the gluten to develop.
Step 3: Knead the Dough
After resting, transfer the dough to a lightly floured surface. Knead the dough for about 5 minutes until it becomes smooth and elastic. This step enhances the texture of your Flaky Roti Canai. Divide the kneaded dough into 8 equal portions and shape each into a ball.
Step 4: Coat and Rest the Dough Balls
Coat each dough ball lightly in oil, ensuring it’s evenly covered. Place the oiled balls on a plate, leaving space between each one to prevent sticking. Cover them with a clean cloth or plastic wrap and let them rest for at least 2 hours, or overnight in the refrigerator for deeper flavor.
Step 5: Shape the Dough
After resting, take one dough ball and place it on a smooth, lightly oiled surface. Gently flatten it with your fingers, then use your hands to stretch it thin, creating layers. Aim for transparency, but be careful not to tear the dough. Repeat with the remaining dough balls.
Step 6: Roll into Spirals
Once each piece is stretched, roll it up like a jelly roll to form a tube. Then, coil the tube into a spiral shape, tucking the end underneath. Place the spiraled roti on a plate and let them rest for another hour to ensure flakiness.
Step 7: Cook the Roti
Heat a non-stick pan over medium heat. Take one rested roti, flatten it gently with your fingers, and transfer it to the hot pan. Cook for about 2 minutes on one side until golden brown, then flip and cook for another 2 minutes. Adjust the heat if necessary to avoid burning.
Step 8: Serve the Flaky Roti Canai
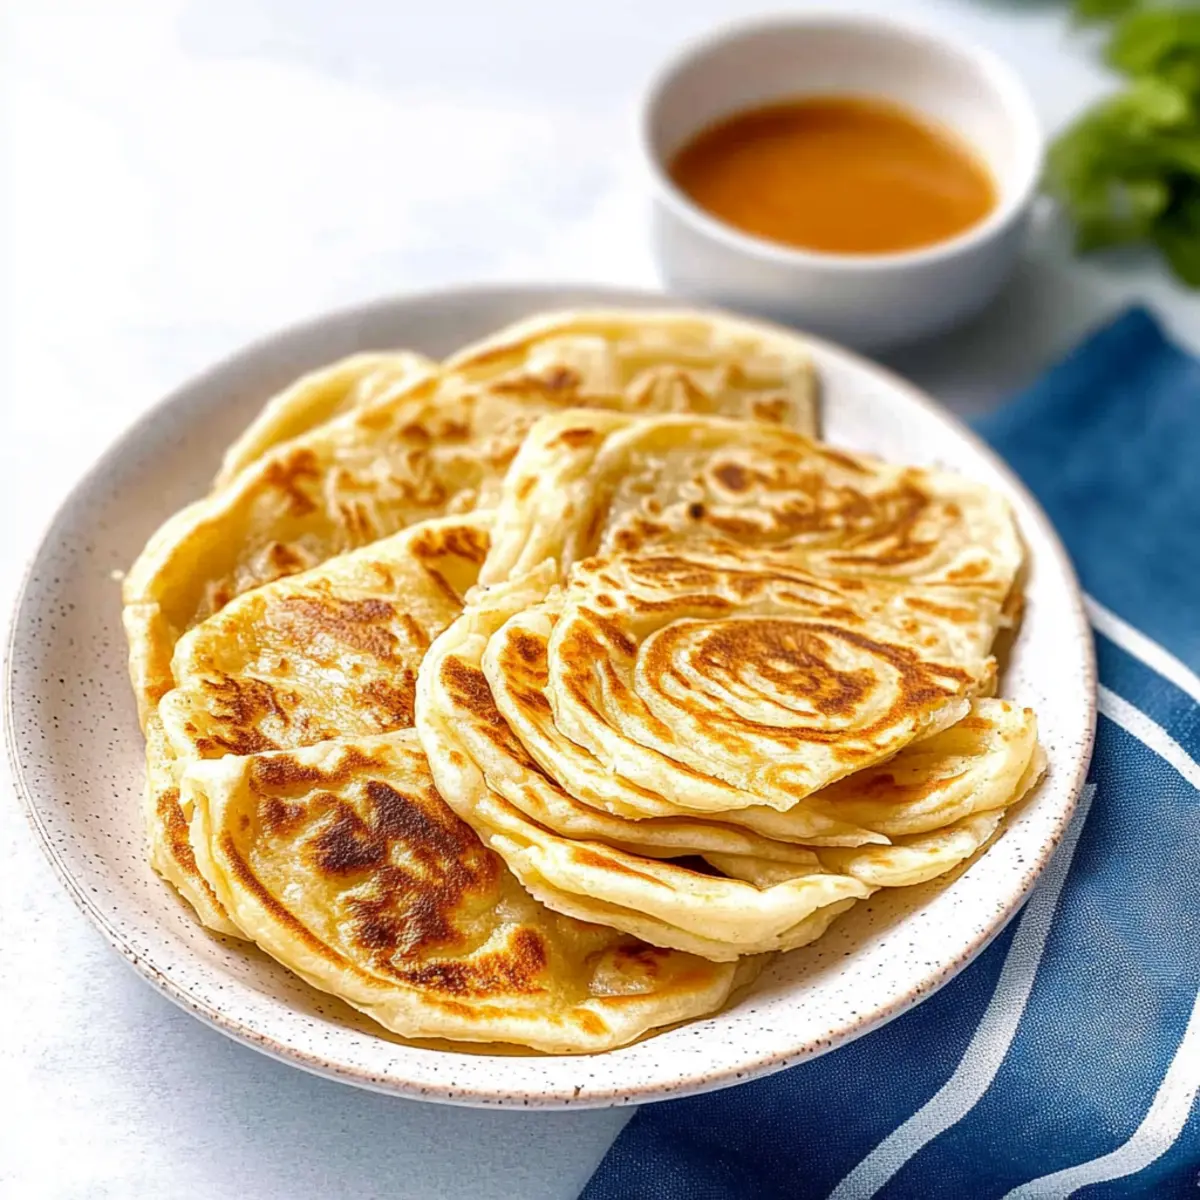
Once cooked, carefully separate the layers of your Flaky Roti Canai by pulling them apart with your hands. Serve warm alongside your favorite curry or enjoy as a snack with some sweetened condensed milk. The flaky, crispy texture is sure to delight everyone!
Flaky Roti Canai Recipe Variations
Feel free to get creative with your Flaky Roti Canai! These simple twists will elevate your flatbread to new culinary heights.
-
Herb-Infused:
Mix in finely chopped cilantro or mint into the dough for a fresh flavor boost that complements curries beautifully. -
Spiced Dough:
Incorporate spices such as cumin or turmeric directly into the dough to give your roti an aromatic, savory kick. Your taste buds will dance with excitement! -
Stuffed Delight:
Add a delicious filling like sautéed vegetables, spiced minced meat, or cheese before rolling for a hearty roti variation. This way, your meal becomes a complete package of flavors! -
Sweet Twist:
For a delightful dessert version, sprinkle cinnamon and sugar between layers before coiling the dough. Serve with a drizzle of condensed milk or honey. -
Lentil Flour Swap:
Replace half the all-purpose flour with lentil flour for a protein-packed, gluten-free option that’s both unique and nutritious. -
Multi-Grain Variety:
Experiment with half whole-wheat flour for a heartier and healthier alternative while still maintaining that glorious flakiness. -
Flatbread Chips:
Use leftover roti to make crispy chips by cutting them into triangles, brushing with oil, and baking until golden. Perfect as a snack or for dipping into your favorite chutney!
Ready to try these variations? Enjoy your culinary journey, and don’t forget to serve with your favorite curry or a delightful Watermelon Smoothie for a refreshing pairing!
Expert Tips for the Flaky Roti Canai Recipe
-
Water Temperature Matters: Use both boiling and room temperature water for the best dough consistency; this ensures proper gluten formation for fluffiness.
-
Resting is Key: Don’t rush the resting times! Allow the dough ample time to relax; this makes stretching it into layers much easier and enhances flakiness.
-
Monitor Heat Carefully: Adjust the heat during cooking; a medium setting prevents burning while allowing for that golden-brown perfection essential in your Flaky Roti Canai.
-
Stretch Gently: When shaping the dough, take your time. Stretch carefully to create thin layers, avoiding tears that can sabotage your flakiness.
-
Experiment with Flavors: Feel free to add herbs or spices to the dough for a unique twist! This elevates your Flaky Roti Canai and keeps meals exciting.
Make Ahead Options
These Flaky Roti Canai are perfect for busy home cooks looking to save time! You can prepare the dough up to 24 hours in advance; simply follow the initial steps, coat each dough ball in oil, and place them in an airtight container in the refrigerator to prevent drying out. The flattened and coiled rotis can also be frozen for up to 3 months – just make sure to layer them with parchment paper to keep them separated. When you’re ready to enjoy, let them thaw in the fridge overnight before cooking them in a hot pan, ensuring they retain their delightful flakiness. With these make-ahead options, you’ll have delicious homemade roti ready with minimal effort, just like fresh from the kitchen!
What to Serve with Flaky Roti Canai
Imagine the perfect meal unfolding, where each bite is a harmonious blend of flavors and aromas, perfectly complemented by delightful sides.
- Rich Chicken Curry: Savory and aromatic, this dish pairs beautifully with flaky layers, allowing you to scoop and savor every morsel.
- Spicy Lentil Dahl: The creamy texture and spiced flavors of dahl enhance your roti, providing a comforting vegetarian option that warms the soul.
- Coconut Chutney: Bright and fresh, the sweetness of coconut chutney adds a tropical twist that balances the roti’s richness.
- Mango Relish: Sweet and tangy, this zesty condiment cuts through the roti’s flakiness, creating a delicious combination that dances on your palate.
- Ginger Tea: A warm cup of ginger tea offers a fragrant, spicy note, enhancing your dining experience while providing comfort on chilly evenings.
- Crispy Fried Vegetables: A mix of lightly battered and fried veggies adds crunch and color, offering a delightful contrast to the soft, flaky roti.
- Sweetened Condensed Milk: Enjoy a drizzle of condensed milk to indulge your sweet tooth, as it transforms the roti into a decadent treat for dessert.
How to Store and Freeze Flaky Roti Canai
Room Temperature: Store cooked roti at room temperature for up to 2 days, wrapped in a clean kitchen towel to maintain softness and prevent drying out.
Fridge: For longer storage, place roti in an airtight container and keep it in the fridge for up to 3 days. Reheat gently on a skillet before serving.
Freezer: Wrap individual roti in plastic wrap and place them in a freezer bag. They can be frozen for up to 2 months. Thaw in the fridge overnight before reheating.
Reheating: To revive your Flaky Roti Canai, heat in a non-stick pan over medium heat for about 2 minutes on each side until warmed through. Enjoy with your favorite dips or curries!

Flaky Roti Canai Recipe FAQs
How do I choose the best flour for Roti Canai?
Absolutely! For the best results, use all-purpose flour or even bread flour for a slightly chewier texture. Look for a finely milled flour with a high protein content, which helps develop gluten, giving your roti that desired flakiness.
How long can I store cooked Roti Canai?
You can store cooked Flaky Roti Canai at room temperature for up to 2 days, wrapped in a clean kitchen towel to maintain its softness. If you plan to keep it longer, place it in an airtight container in the fridge for up to 3 days.
Can I freeze Roti Canai?
Certainly! To freeze, wrap each individual roti tightly in plastic wrap and place them in a labeled freezer bag. They can be stored for up to 2 months. When you’re ready to enjoy, thaw in the fridge overnight, then reheat on a skillet for maximum flakiness.
What should I do if my dough feels too sticky?
Very! If your dough is sticky after mixing, it may need a little more flour. Gradually sprinkle in small amounts of flour, kneading until the dough becomes smooth and manageable. Remember, it’s always better to start with less water and increase as needed for the perfect dough consistency!
Is there a way to make Roti Canai gluten-free?
Absolutely! To make a gluten-free version of Flaky Roti Canai, replace the all-purpose flour with a gluten-free all-purpose flour blend that contains xanthan gum. This will help mimic the elasticity of gluten. Adjust the liquid in the recipe as needed since gluten-free flours often absorb moisture differently.
Can I add flavors or fillings to my Roti Canai?
Of course! You can add finely chopped herbs or spices right into the dough for a delightful twist. Alternatively, create stuffed variations using vegetables, cheese, or cooked meats by placing the filling in the center of the dough before folding it over. Get creative!

Master the Flaky Roti Canai Recipe for an Irresistible Treat
Ingredients
Equipment
Method
- In a large mixing bowl, combine all-purpose flour and sea salt, ensuring even distribution. Gradually pour in boiling water while stirring with a fork or wooden spoon, until clumps form.
- Once clumps form, add room temperature water little by little, mixing until you achieve a soft, scraggly dough. Cover with a damp cloth and let it rest for 30 minutes.
- Transfer the dough to a lightly floured surface. Knead for about 5 minutes until it becomes smooth and elastic. Divide into 8 equal portions and shape into balls.
- Coat each dough ball lightly in oil, placing them on a plate with space between each. Cover and let rest for at least 2 hours, or overnight in the refrigerator.
- Take one dough ball and place it on a lightly oiled surface. Gently flatten it with your fingers, then stretch it thin. Repeat with remaining balls.
- Roll each stretched piece into a tube, then coil into a spiral shape, tucking the end underneath. Let them rest for another hour.
- Heat a non-stick pan over medium heat. Flatten one rested roti and transfer to the pan. Cook for about 2 minutes until golden brown, then flip and cook for another 2 minutes.
- Carefully separate the layers of the Flaky Roti Canai and serve warm with curry or sweetened condensed milk.
Leave a Reply