
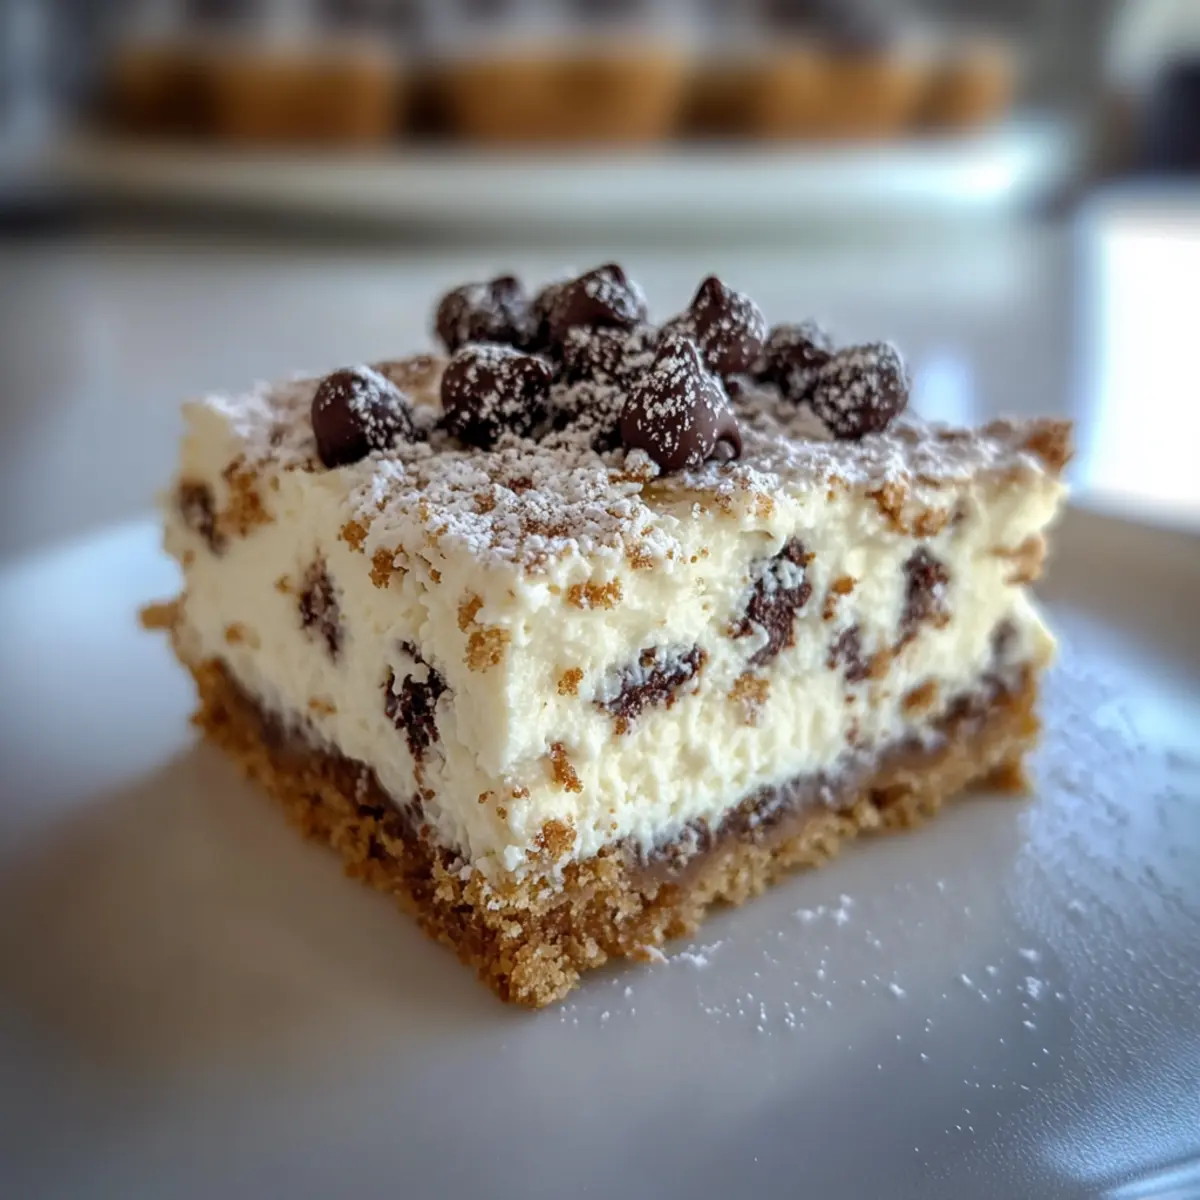
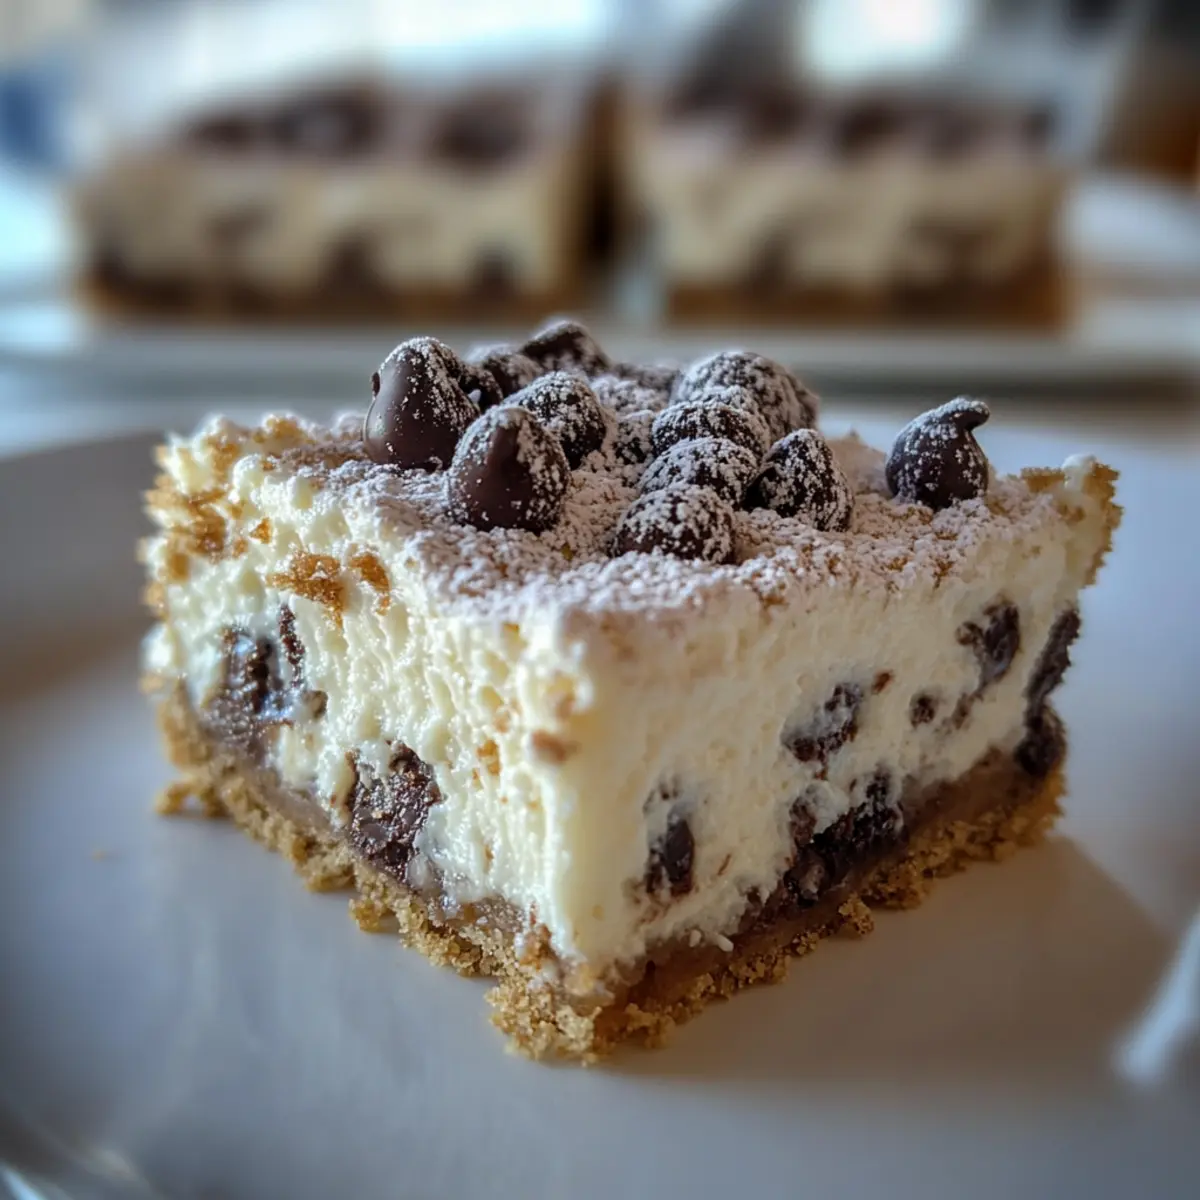
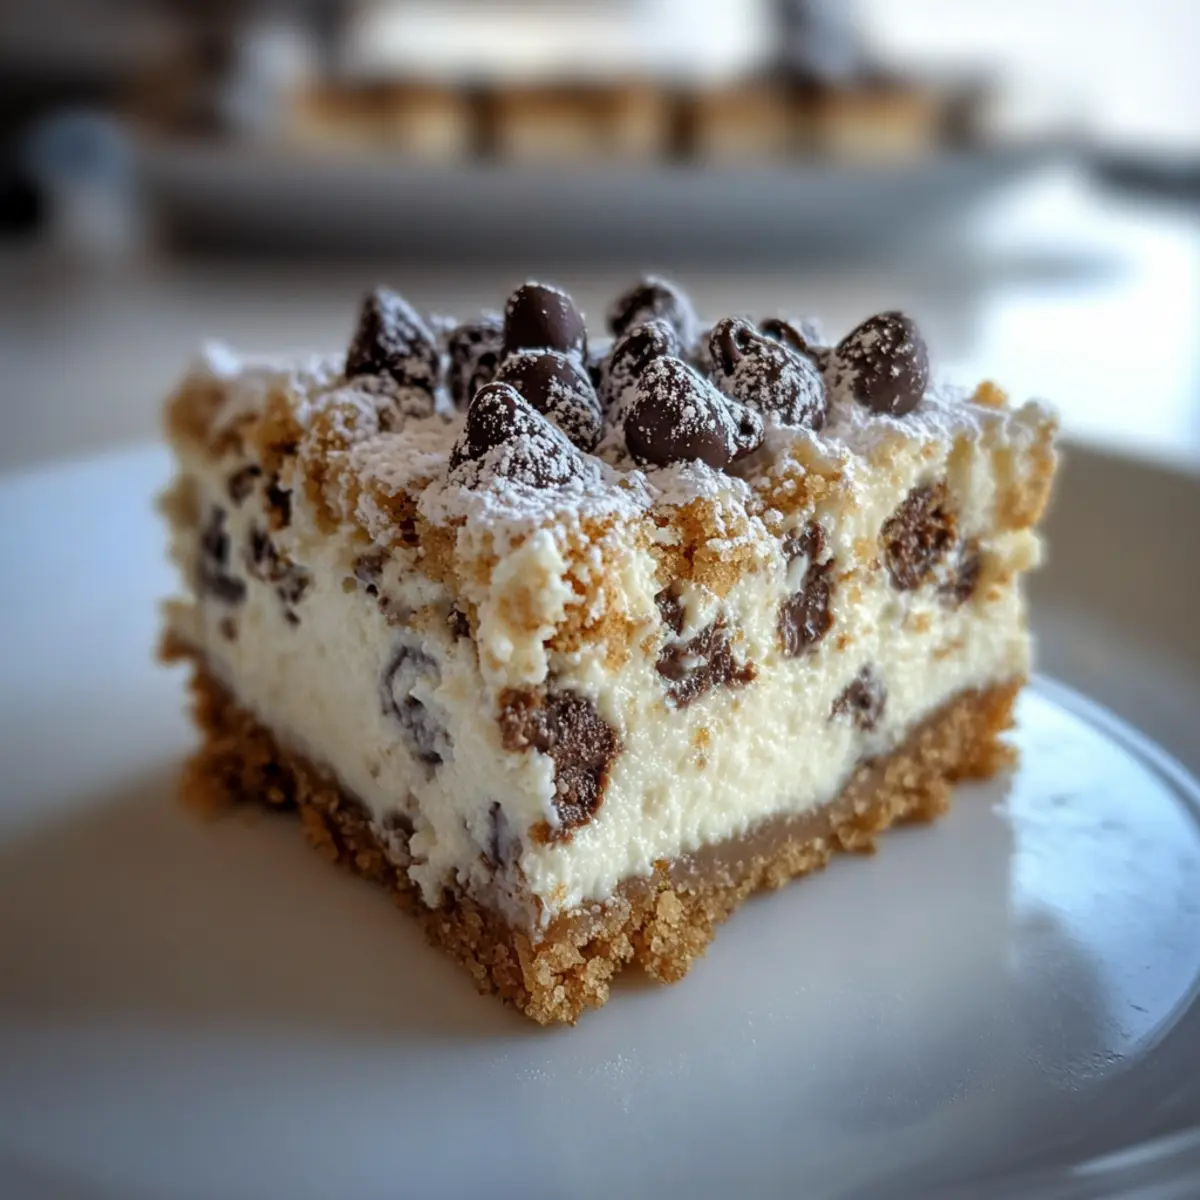
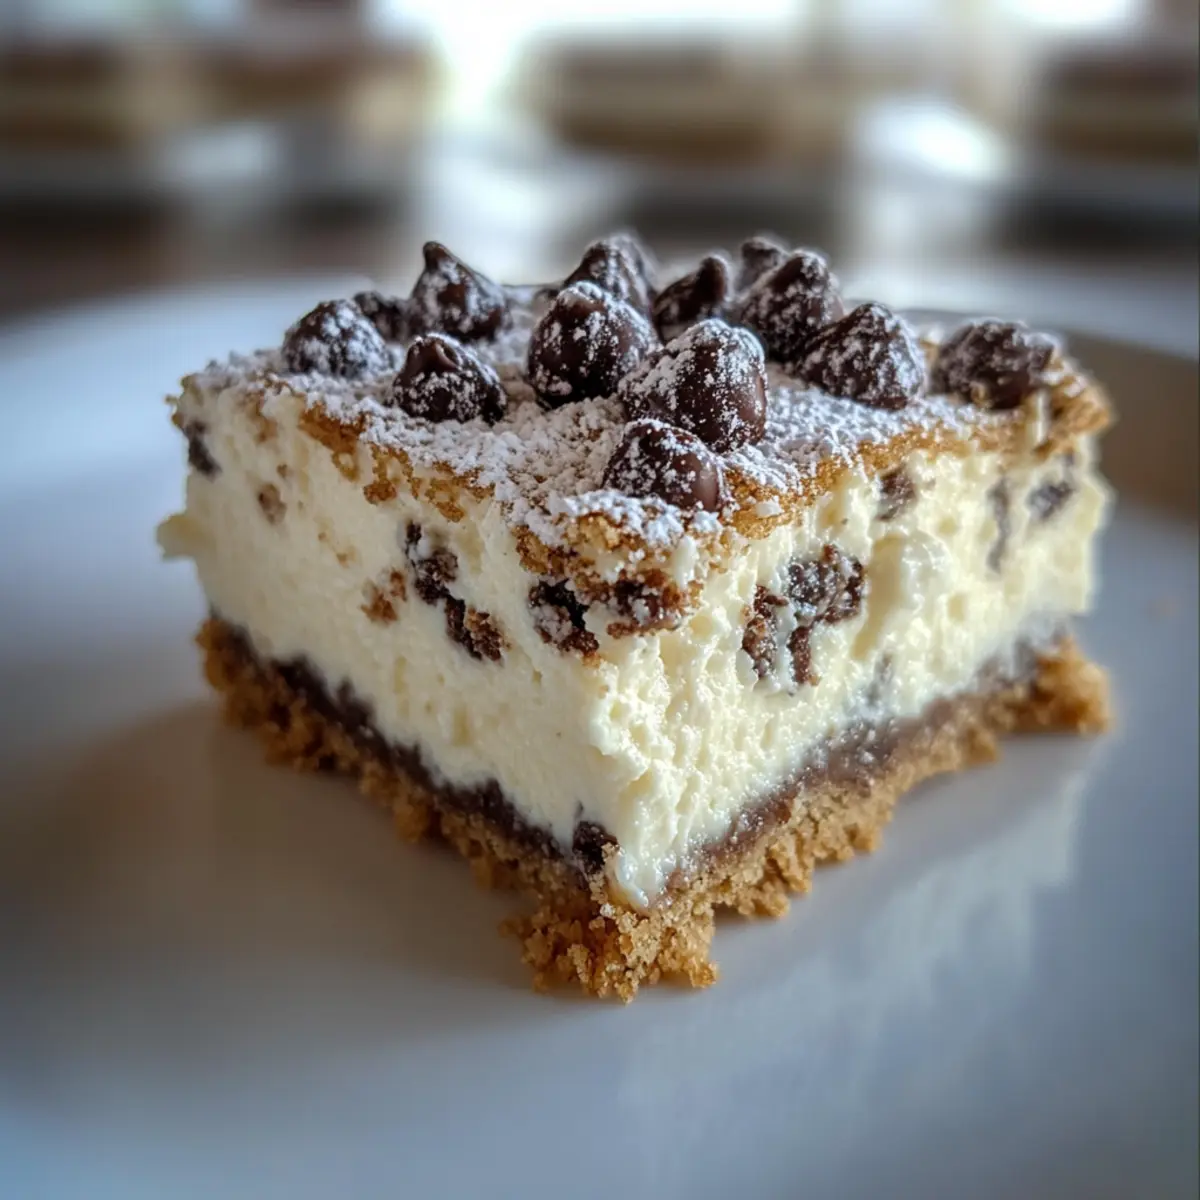
As I sifted through my kitchen, the warm, inviting scent of vanilla wafted through the air, sparking a craving for something indulgent yet easy to whip up. Enter these Cannoli Cheesecake Bars! With just a simple 15-minute prep time, this recipe combines the creamy goodness of ricotta and cheesecake, layered on a crunchy graham cracker crust that’s bound to be a hit at any gathering. Not only are these bars a delightful treat that expertly balances sweet and tangy flavors, but they’re also incredibly versatile—with a gluten-free option to cater to everyone’s tastes. Ready to impress your family and friends with a dessert that’s sure to become a favorite? Let’s dive into this sweet adventure together!
Why Are These Cannoli Cheesecake Bars Special?
Simplicity at Its Finest: Creating these mouthwatering Cannoli Cheesecake Bars is a breeze, requiring just 15 minutes of prep time.
Irresistible Flavor Fusion: The combination of creamy ricotta, smooth cream cheese, and chocolate chips creates an indulgent experience that everyone will love.
Crowd-Pleaser: Perfect for parties or family gatherings, these bars are guaranteed to disappear quickly, making you the star of the dessert table.
Versatile Options: With a gluten-free alternative and room for experimentation, you can easily customize these bars to suit your dietary needs or flavor preferences.
Elevated Presentation: A quick dusting of powdered sugar right before serving adds an elegant touch, ensuring they look as delightful as they taste.
Dive into the world of easy desserts with these Cannoli Cheesecake Bars, and don’t forget to check out my Strawberry Cheesecake Dip for an equally delightful treat!
Cannoli Cheesecake Bars Ingredients
For the Crust
• Graham Cracker Crumbs – Provides the base structure; for a gluten-free option, substitute with almond flour mixed with sugar.
• Sugar – Essential for adding the perfect sweetness to both the crust and filling.
• Butter (melted) – Binds the crust ingredients together, creating a deliciously crispy base.
For the Filling
• Cream Cheese (room temperature) – Forms the creamy filling; ensure it’s at room temperature for a smooth texture.
• Ricotta Cheese – Adds that signature cannoli flavor; make sure it’s well-drained for the best results.
• Eggs – Acts as a binding agent; add them one at a time for even mixing.
• Vanilla Extract – Enhances the overall flavor, bringing everything together beautifully.
• Mini Chocolate Chips – Infuses richness and texture; opt for mini chips to prevent sinking into the filling.
With these simple ingredients, you’re just moments away from crafting a delightful batch of Cannoli Cheesecake Bars that will impress at any occasion!
Step‑by‑Step Instructions for Cannoli Cheesecake Bars
Step 1: Prepare the Crust
Preheat your oven to 325°F (163°C). In a mixing bowl, combine graham cracker crumbs, sugar, and melted butter until the mixture resembles wet sand. Press this mixture firmly into the bottom of an 8×8 inch baking pan lined with parchment paper, creating a slight lip around the edges. Bake for about 10 minutes until set and lightly golden.
Step 2: Make the Filling
While the crust bakes, in a large mixing bowl, beat the room-temperature cream cheese and sugar together until smooth and creamy. Add the eggs one at a time, mixing well after each addition to ensure a light mixture. Pour in the vanilla extract, and gently fold in the well-drained ricotta cheese along with mini chocolate chips, making sure not to overmix.
Step 3: Combine Filling and Crust
Once your filling is ready, remove the crust from the oven and let it cool for a few minutes. Spread the cannoli cheesecake filling evenly over the warm crust using a spatula, ensuring it reaches every corner. Smooth the top for an appealing finish before returning it to the oven for baking.
Step 4: Bake to Perfection
Place the filled pan back in your preheated oven and bake for 40-45 minutes. Look for the edges to be set and a slight jiggle in the center, which indicates it’s done. Avoid overbaking to prevent cracks from forming on the surface of your Cannoli Cheesecake Bars.
Step 5: Cool Down
Once baked, remove the pan from the oven and let the Cannoli Cheesecake Bars cool at room temperature for about an hour. This gradual cooling allows the flavors to develop beautifully. Afterward, cover and refrigerate for at least 4 hours, or preferably overnight, to achieve the ideal texture.
Step 6: Serve and Enjoy
When ready to serve, lift the bars out of the pan using the parchment paper, and slice them into squares. For an elegant touch, dust with powdered sugar just before serving. Your delectable Cannoli Cheesecake Bars are now ready to impress family and friends!
What to Serve with Irresistible 15-Minute Cannoli Cheesecake Bars
Pair your delightful dessert with complementary dishes that enhance the experience, turning it into a memorable meal.
-
Fresh Berries: The tartness of strawberries, raspberries, or blueberries adds a refreshing contrast to the sweet richness of the bars. Their vibrant colors create an appealing presentation.
-
Italian Espresso: A bold cup of espresso marries beautifully with the creamy sweetness of cannoli flavors. The deep coffee notes elevate the overall indulgence.
-
Whipped Cream: A dollop of freshly whipped cream introduces a light and airy element, balancing the dense texture of the cheesecake bars perfectly.
-
Zesty Citrus Salad: A simple salad of orange and grapefruit segments infused with mint offers a bright, tangy bite, cutting through the sweetness of the dessert.
-
Chocolate Drizzle: Drizzling warm chocolate sauce over the bars before serving adds an extra layer of decadence, appealing to all chocolate lovers.
-
Mint Tea: A soothing cup of mint tea acts as a wonderful palate cleanser after enjoying these Cannoli Cheesecake Bars, enhancing the refreshing aftertaste.
-
Vanilla Ice Cream: A scoop of creamy vanilla ice cream serves as a delightful contrast, providing a cold, smooth texture that complements the warmth of the dessert.
-
Candied Nuts: Crunchy candied nuts add a delightful texture and caramel sweetness, harmonizing perfectly with the creamy filling of the bars.
-
Fruit Sorbet: A scoop of lemon or raspberry sorbet offers a refreshing and light finish, drawing out the flavors of the dessert without overwhelming the palate.
Storage Tips for Cannoli Cheesecake Bars
-
Fridge: Store leftover Cannoli Cheesecake Bars in an airtight container for up to 5 days to maintain their creamy texture and flavor.
-
Freezer: You can freeze these bars for up to 2 months. Ensure they are well-wrapped in plastic wrap and aluminum foil to prevent freezer burn.
-
Thawing: To enjoy frozen bars, transfer them to the fridge for a few hours or overnight to defrost slowly, preserving their delicious taste and texture.
-
Reheating: Although these bars are best served chilled, if you prefer them slightly warm, microwave individual pieces for about 10-15 seconds. Enjoy!
Make Ahead Options
These Cannoli Cheesecake Bars are ideal for meal prep, making them a breeze for busy weeknights! You can prepare the graham cracker crust up to 24 hours in advance; simply bake it and store it in an airtight container at room temperature. As for the filling, it can be made 1-2 days ahead; just keep it refrigerated until you’re ready to use it. On baking day, pour the filling over the crust and bake as directed. To maintain the bars’ delightful texture, allow them to cool gradually and refrigerate for at least 4 hours or overnight before slicing. This way, you’ll have irresistibly creamy Cannoli Cheesecake Bars with minimal last-minute effort!
Expert Tips for Cannoli Cheesecake Bars
-
Room Temperature Ingredients: Ensure all dairy ingredients, like cream cheese and ricotta, are at room temperature to achieve a smooth filling without lumps.
-
Watch the Bake Time: Bake until the edges are set with a slight jiggle in the center; overbaking can lead to cracks and a drier texture in your Cannoli Cheesecake Bars.
-
Cooling Gradually: Let the bars cool slowly at room temperature before refrigerating. Rushing this process can cause cracks, affecting both appearance and taste.
-
Use Mini Chocolate Chips: Choose mini chocolate chips for even distribution in the filling, as regular chips tend to sink and affect the beautiful layers of your dessert.
-
Experiment with Flavors: Feel free to incorporate orange zest or additional extracts for a unique flair, ensuring you maintain the essence of classic cannoli flavors.
Cannoli Cheesecake Bars Variations
Feel free to explore exciting adaptations for these Cannoli Cheesecake Bars that will make your taste buds dance!
-
Gluten-Free: Replace graham cracker crumbs with almond flour mixed with sugar for a deliciously crunchy base.
This swap allows everyone to delight in these scrumptious bars without the gluten. -
Dairy-Free: Use coconut cream cheese and almond milk ricotta for an equally creamy filling that’s dairy-free.
Your guests won’t even miss the traditional dairy while enjoying this delectable treat! -
Citrus Zest Boost: Add a teaspoon of orange or lemon zest to the filling for a bright, zesty twist.
This addition beautifully balances sweetness and gives a refreshing touch, enhancing the flavor profile. -
Nutty Crunch: Incorporate finely chopped pistachios or walnuts into the filling for added texture.
The added crunch will surprise your guests and elevate your Cannoli Cheesecake Bars to new heights! -
Extra Chocolate: Double the amount of mini chocolate chips or swap in dark chocolate for a richer experience.
It’s the perfect way to satisfy chocolate cravings while staying true to the dessert’s cannoli roots. -
Miniature Version: Halve the ingredients to create bite-sized versions—perfect for parties or a sweet snack.
These mini bars will be a hit at gatherings, offering an elegant touch that looks impressive on any dessert table. -
Spicy Kick: Add a pinch of cinnamon or nutmeg to the filling for a warm, aromatic flavor note.
It gives a cozy twist, making these bars even more inviting, especially during chilly seasons.
For more delicious twists on cheesecake, don’t forget to check out my Strawberry Cheesecake Dip or the indulgent No-Bake Biscoff Cheesecake!
Cannoli Cheesecake Bars Recipe FAQs
What type of graham cracker crumbs should I use for the crust?
Absolutely, regular graham cracker crumbs work wonderfully for a traditional crust. If you’re looking for a gluten-free alternative, simply use 1 1/4 cups of almond flour mixed with 2 tablespoons of sugar. This substitution will still give you that delightful crunch while accommodating gluten-free diets.
How should I store leftover Cannoli Cheesecake Bars?
To keep your Cannoli Cheesecake Bars fresh, store them in an airtight container in the fridge for up to 5 days. If you’d like to keep them longer, they freeze beautifully for up to 2 months. Just make sure to wrap them well in plastic wrap and aluminum foil to prevent freezer burn!
Can I freeze Cannoli Cheesecake Bars, and how do I do it?
Definitely! To freeze your Cannoli Cheesecake Bars, first ensure they are completely cooled and cut into squares. Then wrap each piece tightly in plastic wrap and place them in a freezer-safe bag or container. When you’re ready to enjoy them, simply transfer the bars to the fridge for a few hours or overnight to thaw. Enjoy them cold or, if you prefer a warm treat, microwave for about 10-15 seconds before serving.
What should I do if the filling is lumpy?
If you find that your filling is a bit lumpy, don’t fret! The key is ensuring that your cream cheese and ricotta are at room temperature before mixing. This allows for a smoother texture. If you’ve already mixed and find lumps, you can beat the mixture a bit longer until it becomes creamy. Additionally, using a hand mixer can help achieve that velvety consistency you’re aiming for.
Are these Cannoli Cheesecake Bars suitable for people with dairy allergies?
While the traditional recipe includes dairy, you can absolutely make these bars dairy-free! Substitute the cream cheese with coconut cream cheese and use almond milk ricotta. This way, you can still enjoy the beautiful flavors of cannoli without the dairy-related issues. Always check ingredient labels to ensure they fit your dietary restrictions!
How can I enhance the flavor of the Cannoli Cheesecake Bars?
For a delightful twist, consider adding some orange zest to the filling before baking; it introduces a lovely citrus note that pair beautifully with the sweet ricotta. You can also sprinkle extra mini chocolate chips on top before baking for added richness. The more flavor, the merrier!
Delectable Cannoli Cheesecake Bars in Just 15 Minutes
Ingredients
Equipment
Method
- Preheat your oven to 325°F (163°C). In a mixing bowl, combine graham cracker crumbs, sugar, and melted butter until the mixture resembles wet sand. Press this mixture firmly into the bottom of an 8x8 inch baking pan lined with parchment paper, creating a slight lip around the edges. Bake for about 10 minutes until set and lightly golden.
- While the crust bakes, in a large mixing bowl, beat the room-temperature cream cheese and sugar together until smooth and creamy. Add the eggs one at a time, mixing well after each addition. Pour in the vanilla extract, and gently fold in the well-drained ricotta cheese along with mini chocolate chips.
- Once your filling is ready, remove the crust from the oven and let it cool for a few minutes. Spread the cannoli cheesecake filling evenly over the warm crust using a spatula.
- Place the filled pan back in your preheated oven and bake for 40-45 minutes. Look for the edges to be set and a slight jiggle in the center, indicating it's done. Avoid overbaking.
- Once baked, remove the pan from the oven and let the Cannoli Cheesecake Bars cool at room temperature for about an hour. Afterward, cover and refrigerate for at least 4 hours, or preferably overnight.
- When ready to serve, lift the bars out of the pan using the parchment paper, and slice them into squares. Dust with powdered sugar just before serving.
Leave a Reply