
As I watched my guests dive into the dessert table, the whispers of delight became a beautiful symphony. It was no surprise that my homemade Brown Butter Brookies stole the spotlight! These indulgent treats blend the rich, fudgy goodness of a brownie with the warm, caramelized flavor of a chocolate chip cookie—two favorites in one heavenly bar. What’s more, they’re a crowd-pleasing, one-pan dessert that comes together effortlessly, making them the perfect remedy for busy days when you still crave something delightful. The joy of baking (and sharing) something so delicious makes my heart soar. Are you ready to whip up a batch and create some sweet memories?
Why are Brown Butter Brookies a must-try?
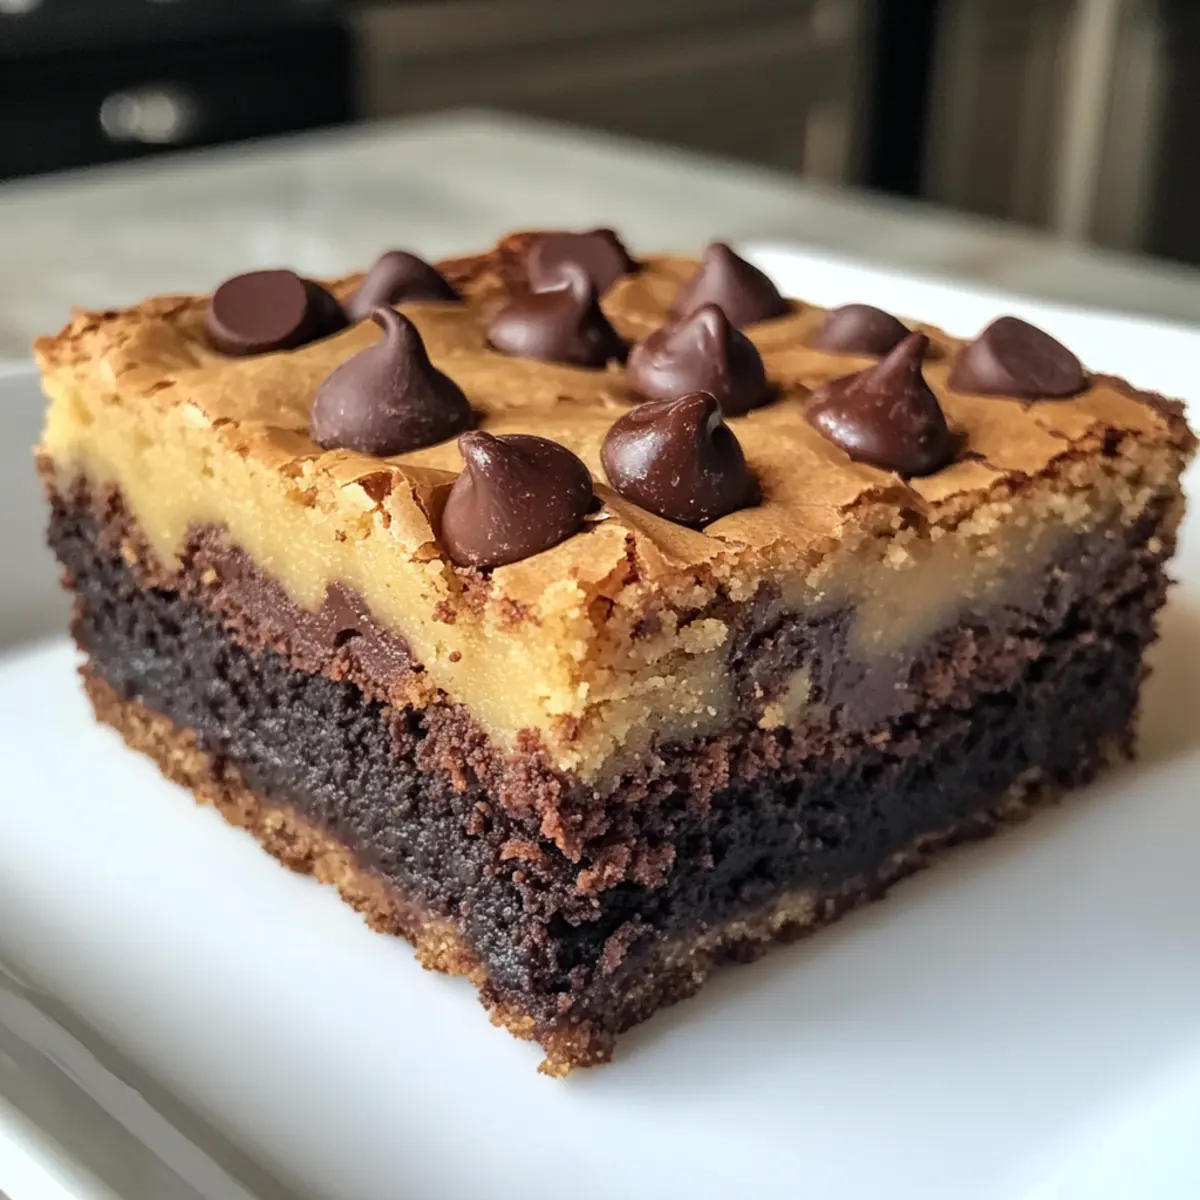
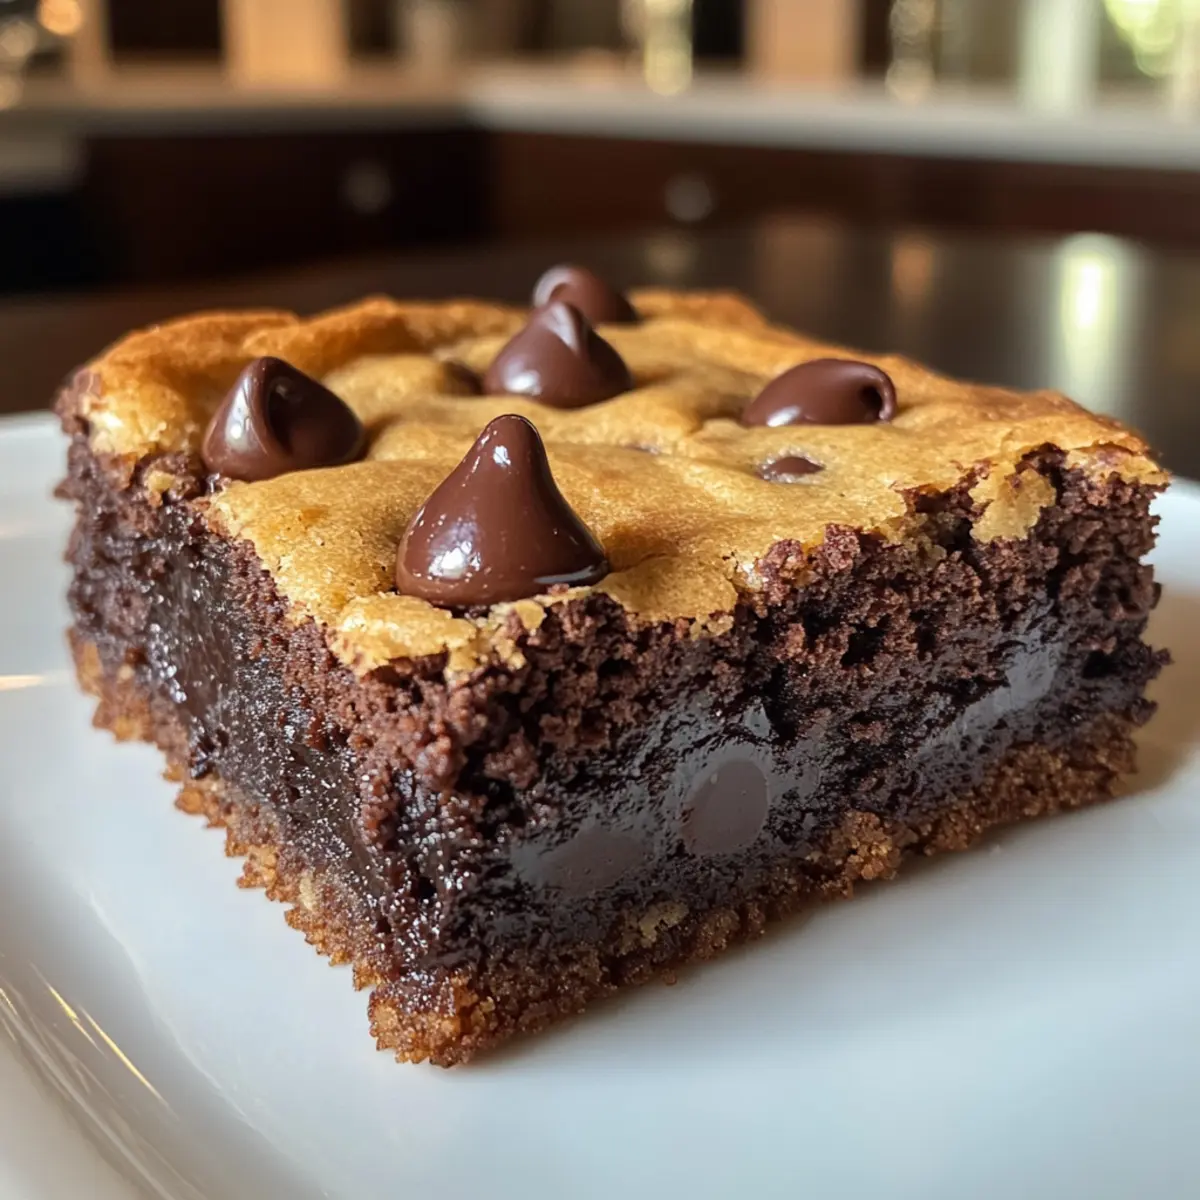
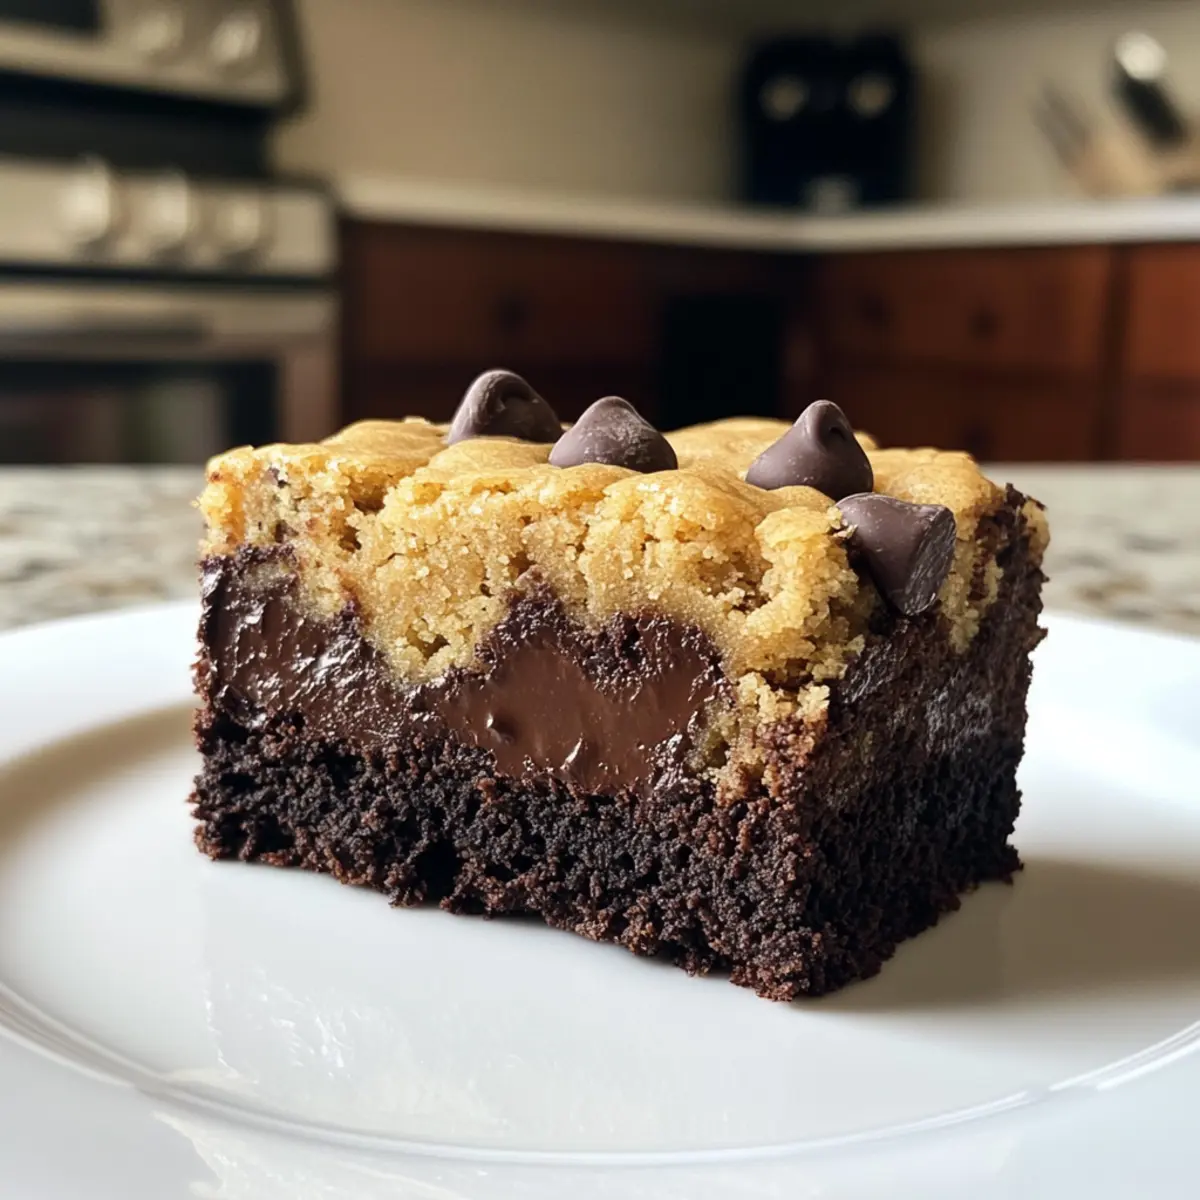
Decadent Layers: Experience the perfect harmony of a rich brownie layer and a chewy cookie layer, delivering double the indulgence in every bite.
Effortless Baking: With a simple one-pan method, you’ll save time in the kitchen while creating a stunning dessert that looks as good as it tastes.
Universal Appeal: These brookies are a crowd-pleaser that will impress family, friends, and guests alike—no one can resist the allure of chocolate!
Versatile Treat: Feel free to personalize them with your favorite mix-ins, from nuts to swirls of cookie butter, making them uniquely yours.
Savor the Joy: Imagine enjoying these warm, topped with a scoop of ice cream—the ultimate treat for any occasion. Follow this easy recipe, and let the sweet memories begin!
Brown Butter Brookies Ingredients
For the Cookie Layer
• Unsalted Butter – Provides moisture and richness; use salted if unsalted isn’t available.
• Granulated Sugar – Adds sweetness and helps achieve a chewy texture; no substitutions recommended.
• Light Brown Sugar – Contributes moisture and adds caramel flavor; dark brown sugar can bring deeper taste.
• All-Purpose Flour – Provides structure; a gluten-free blend can substitute if needed.
• Egg – Binds ingredients and adds moisture; a flax egg can work for a vegan alternative.
• Chocolate Chips – Adds bursts of chocolate throughout; milk chocolate offers sweetness, while dark chocolate elevates intensity.
For the Brownie Layer
• Bittersweet Chocolate – Enhances chocolate flavor; semi-sweet can be used as an alternative.
With these fantastic ingredients, you’re all set to create delicious Brown Butter Brookies that will wow your tastebuds!
Step‑by‑Step Instructions for Brown Butter Brookies
Step 1: Brown the Butter
Begin by melting the unsalted butter in a saucepan over medium heat, stirring occasionally until it turns a beautiful golden brown and emits a nutty aroma, about 5–7 minutes. Remove it from heat and allow it to cool slightly before transferring it to the refrigerator to chill for about 1 hour, until partially solidified.
Step 2: Make the Cookie Dough
In a large mixing bowl, combine the chilled brown butter, granulated sugar, and light brown sugar. Use a hand mixer or a wooden spoon to beat the mixture until it’s creamy and well-blended, roughly 2–3 minutes. Beat in one egg, ensuring it’s fully incorporated, then gradually mix in the all-purpose flour before folding in the chocolate chips for the cookie layer of your Brown Butter Brookies.
Step 3: Prepare the Brownie Batter
In a separate saucepan, gently melt the bittersweet chocolate over low heat, stirring constantly until smooth. Once melted, remove from heat and stir in additional elements—the remaining butter, sugar, and egg—until the mixture is glossy and well blended. Carefully fold in a pinch of flour to give your brownie layer a perfect texture, creating a delightful contrast to the cookie layer.
Step 4: Layer the Mixtures
Grab an 8 x 8 inch baking pan and grease it lightly. Spoon half of the brownie batter into the bottom of the pan, spreading it evenly. Next, dollop spoonfuls of the cookie dough over the brownie layer and then add the remaining brownie batter atop. Using a spatula, gently swirl the batters together to create a marbled effect, enticing those who will enjoy these Brown Butter Brookies.
Step 5: Bake to Perfection
Preheat your oven to 350°F (175°C) and place the assembled brookies in the oven once it’s ready. Bake for approximately 25 minutes, keeping an eye out for golden edges while ensuring the center remains soft. If the edges start to brown too quickly, cover the pan loosely with foil to prevent burning while the middle finishes cooking.
Step 6: Cool and Slice
Once baked to perfection, remove your Brown Butter Brookies from the oven and let them cool completely in the pan. For cleaner cuts, refrigerate for about 30 minutes before slicing into squares. The result will be an irresistible combination of chewy cookie and fudgy brownie that will have everyone reaching for seconds!
How to Store and Freeze Brown Butter Brookies
Room Temperature: Store your brookies in an airtight container at room temperature for up to 4 days to maintain their chewy texture.
Fridge: If you prefer a chilled treat, keep them in the fridge for up to a week. Make sure they are wrapped securely to avoid drying out.
Freezer: For longer storage, wrap the brookies tightly in plastic wrap and then in aluminum foil. They can be frozen for up to 3 months.
Reheating: When you’re ready to enjoy, thaw them at room temperature or warm them in the microwave for about 10–15 seconds for that freshly baked allure.
Make Ahead Options
These Brown Butter Brookies are fantastic for meal prep and make life so much easier on busy days! You can prepare the cookie dough and brownie batter up to 24 hours in advance; just store them separately in airtight containers in the refrigerator to keep them fresh and prevent drying out. When you’re ready to bake, simply layer the batters in the pan and bake as directed. You can also bake the brookies ahead of time, then let them cool and store the cut squares in an airtight container for up to 3 days at room temperature or freeze them for longer storage. Just give them a quick warm-up in the microwave before serving for that just-baked taste!
Brown Butter Brookies Variations
Feel free to explore these delightful takes on Brown Butter Brookies, elevating your baking experience with unique flavors and textures!
-
Nuts: Add walnuts or pecans for a satisfying crunch in every bite, enhancing both texture and flavor.
-
Peanut Butter Swirl: Incorporate peanut butter into the brownie batter for a creamy, nutty twist. This will create a rich, indulgent experience that peanut butter lovers will adore.
-
Cookie Butter Delight: Swirl in your favorite cookie butter for a spiced, sweet flavor that melds beautifully with the brookie layers.
-
Chocolate Variety: Mix in a combination of milk, semi-sweet, and dark chocolate chips to deliver varied chocolate intensity. Each bite will bring a surprise!
-
Spice it Up: Add a dash of cinnamon or a hint of sea salt on top to elevate flavors and bring a warmth that complements the sweetness.
-
Dried Fruit: Fold in some chopped dried cherries or cranberries for a tart contrast, adding a fruity punch that balances the rich chocolate.
-
Vegan Version: For a completely plant-based treat, substitute traditional ingredients with alternatives like a flax egg and coconut oil to maintain that fudgy goodness.
-
Chili Chocolate: For those who crave heat, introduce a sprinkle of cayenne pepper or chili powder to the brownie layer. The spicy kick will contrast deliciously with the sweetness!
Whether you’re adjusting for dietary needs or just looking to switch things up, each variation promises to enhance your experience with these beloved Brown Butter Brookies. Happy baking!
Tips for the Best Brown Butter Brookies
- Chill the Butter: Allowing the browned butter to cool fully is crucial; it enhances flavor and gives the brookies a healthier texture.
- Don’t Overmix: Gently fold in ingredients for a chewy cookie layer; overmixing can lead to tough brookies.
- Check Bake Time: Ovens vary, so start checking for doneness around the 20-minute mark and cover with foil if needed to avoid overbaking.
- Even Layers: Ensure even distribution of cookie and brownie batters to create that beautiful marbled effect—it’s all about presentation!
- Cool Before Cutting: Patience is key; letting the brookies cool completely ensures cleaner cuts and retains their chewy texture.
These expert tips will help you create the most delicious Brown Butter Brookies that everyone will adore!
What to Serve with Brown Butter Brookies
Imagine gathering around the table with friends, savoring rich flavors that linger and invite laughter and warmth.
- Vanilla Ice Cream: A scoop of vanilla ice cream melts effortlessly on the warm brookies, creating a delightful contrast of temperatures.
- Coffee: Brew a charming cup of coffee to enhance the chocolatey notes, making each bite of the brookies even more indulgent.
- Caramel Sauce: Drizzle smooth, buttery caramel over the brookies for an extra layer of sweetness; it transforms each square into a decadent treat.
- Chopped Nuts: Add a crunchy texture with chopped walnuts or pecans; their earthy flavors complement the chocolate beautifully while adding a satisfying crunch.
- Hot Chocolate: Embrace the chocolate theme with a rich, creamy hot chocolate, inviting a cozy, comforting vibe perfect for gatherings.
- Fresh Berries: Fresh strawberries or raspberries add a burst of tartness that balances the sweetness of the brookies, bringing a refreshing note to every bite.
- Milk: A classic pairing—enjoy your brookies with a cold glass of milk, enhancing the dessert experience with essential creaminess.
- Whipped Cream: Light and airy whipped cream is a delightful topping that adds a creamy layer of sweetness, perfect for dolloping on each square.
- Cheesecake Bars: Serve alongside cheesecake bars for an exciting dessert spread; the creamy texture and tangy flavor perfectly balance the brookies’ sweetness.
Brown Butter Brookies Recipe FAQs
How do I know if my brown butter is ready?
You’ll know your brown butter is ready when it turns a lovely golden brown color, usually taking about 5-7 minutes over medium heat. Keep stirring until you notice a nutty aroma—this indicates that the water has evaporated, and the milk solids are browning, which enhances the flavor beautifully.
What should I do to keep my brookies fresh for longer?
Store your brookies in an airtight container at room temperature for up to 4 days. If you prefer, you can also keep them in the fridge for up to a week. Just make sure they are tightly wrapped to prevent them from drying out!
Can I freeze Brown Butter Brookies? If so, how?
Absolutely! To freeze your brookies, wrap them tightly in plastic wrap and then in aluminum foil to prevent freezer burn. They can last for up to 3 months in the freezer. When you’re ready to enjoy, simply let them thaw at room temperature or warm them in the microwave for about 10-15 seconds.
Why did my brookies turn out dry or tough?
This can happen if the dough is overmixed or if the brookies are baked for too long. I recommend folding the ingredients gently to preserve the chewy texture and keeping a close eye on the bake time. If you notice golden edges but a soft center, consider covering them with foil to prevent overbaking.
Are these brookies pet-friendly?
No, it’s best to avoid giving any parts of these Brown Butter Brookies to pets, especially dogs. Ingredients like chocolate and sugar can be harmful to pets. Always ensure that any treats you share with your furry friends are safe and suitable for their diets.

Irresistible Brown Butter Brookies That Will Wow Your Tastebuds
Ingredients
Equipment
Method
- Begin by melting the unsalted butter in a saucepan over medium heat until it turns golden brown and smells nutty, about 5–7 minutes. Chill for 1 hour after cooling slightly.
- In a large mixing bowl, combine the chilled brown butter, granulated sugar, and light brown sugar. Beat until creamy, about 2–3 minutes. Mix in the egg, then incorporate flour and chocolate chips.
- Melt the bittersweet chocolate in a separate saucepan over low heat. Stir in the remaining butter, sugar, and egg until glossy. Fold in a pinch of flour.
- Grease an 8 x 8 inch baking pan. Spread half of the brownie batter at the bottom, dollop cookie dough over it, then add the remaining brownie batter. Swirl gently to marble.
- Preheat oven to 350°F (175°C). Bake for about 25 minutes until edges are golden and center is soft. Use foil if edges brown quickly.
- Cool completely in the pan, then refrigerate for 30 minutes before slicing into squares.
Leave a Reply