
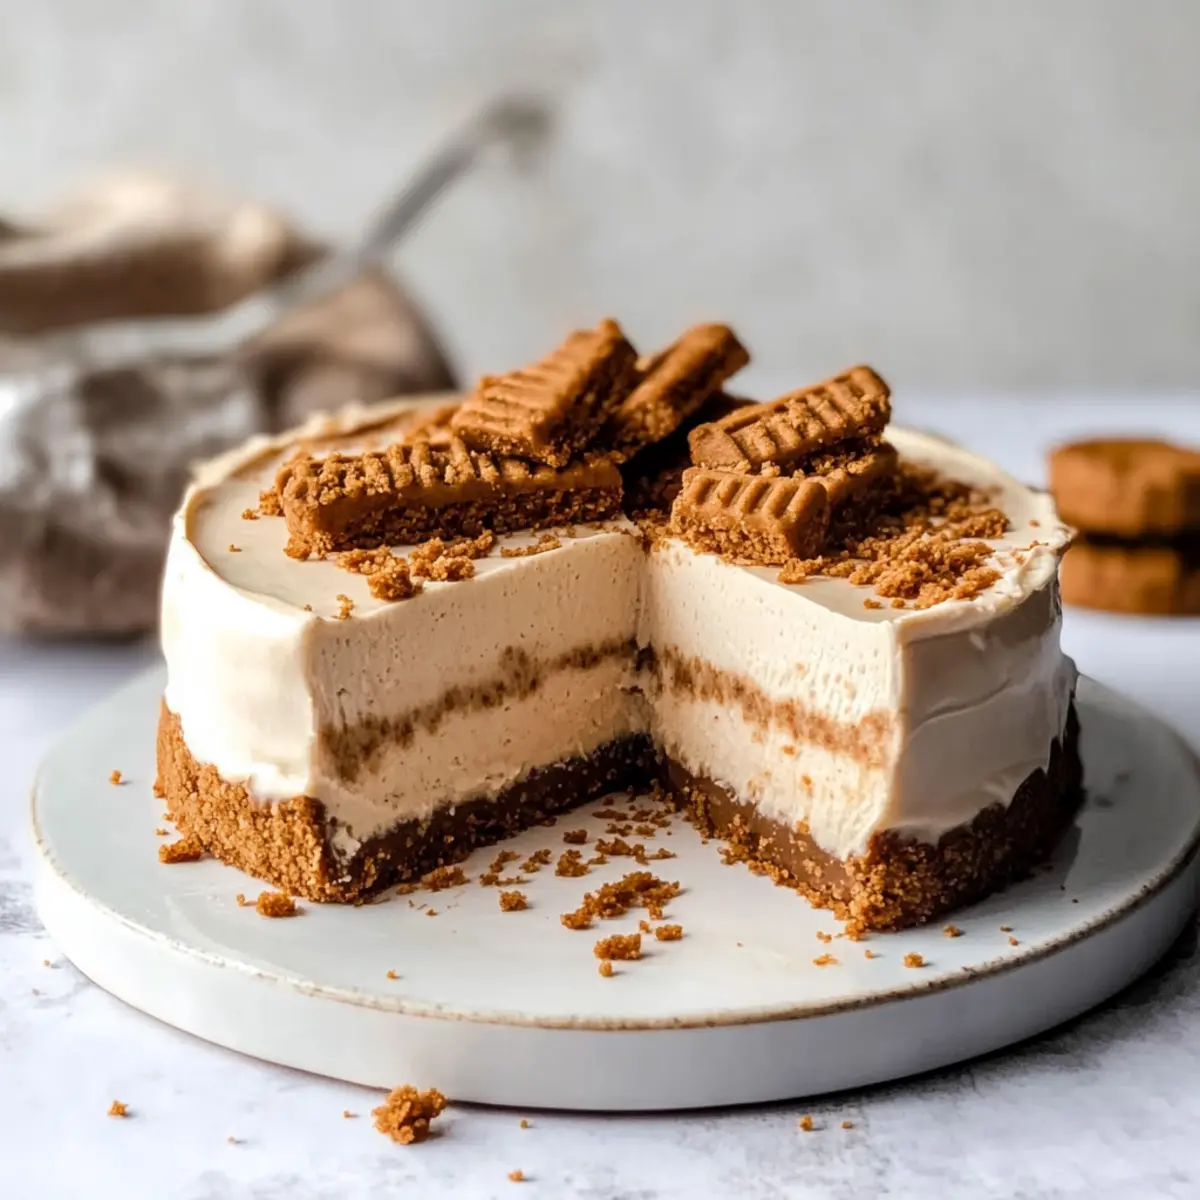
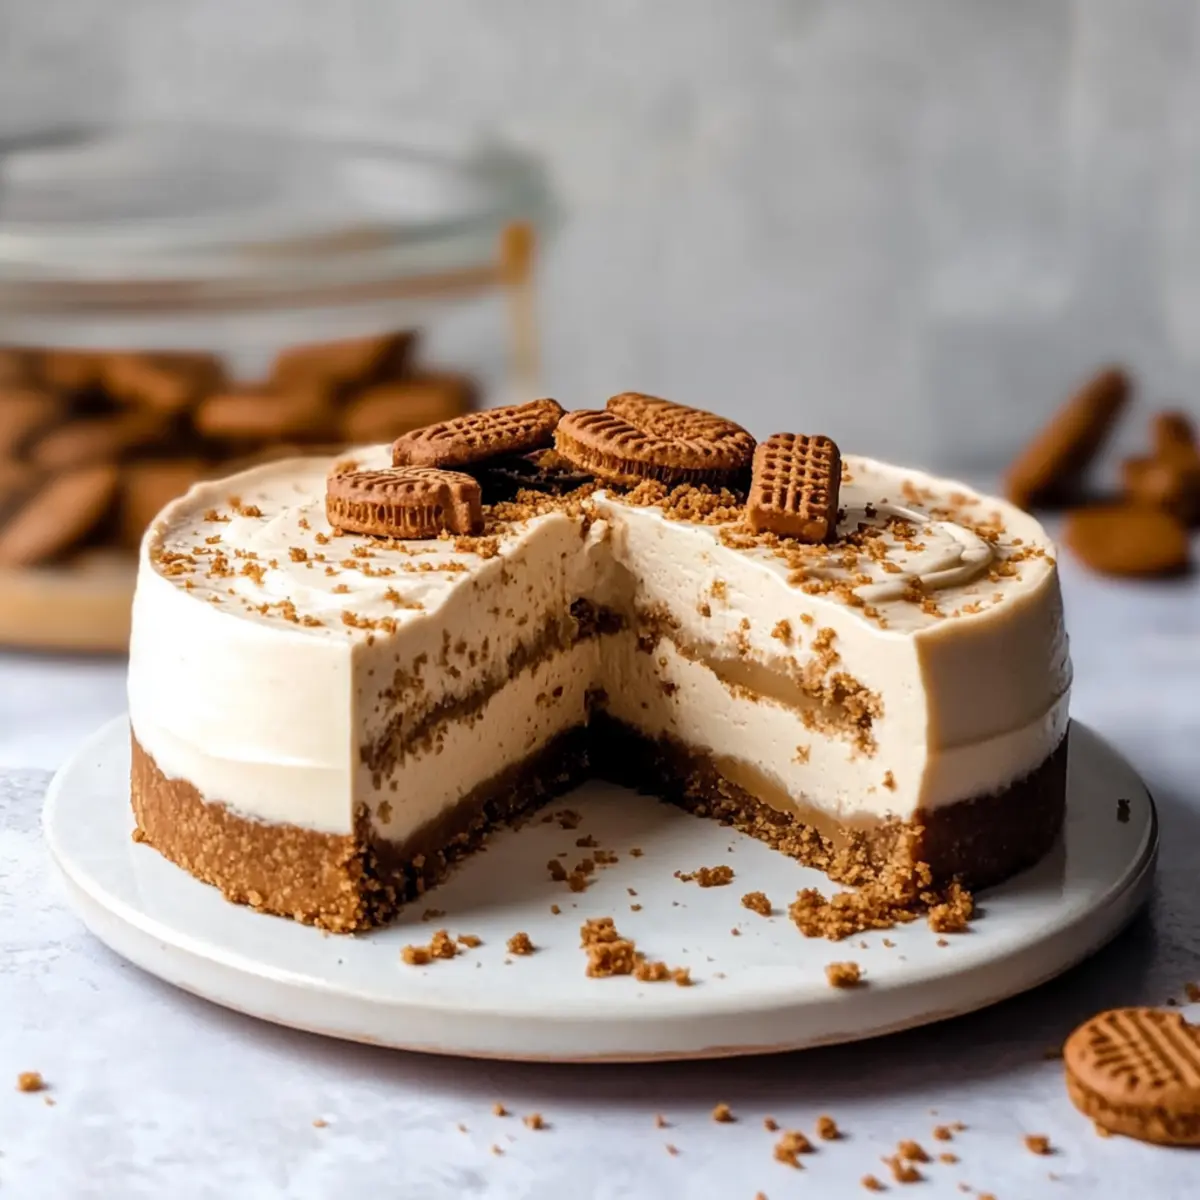
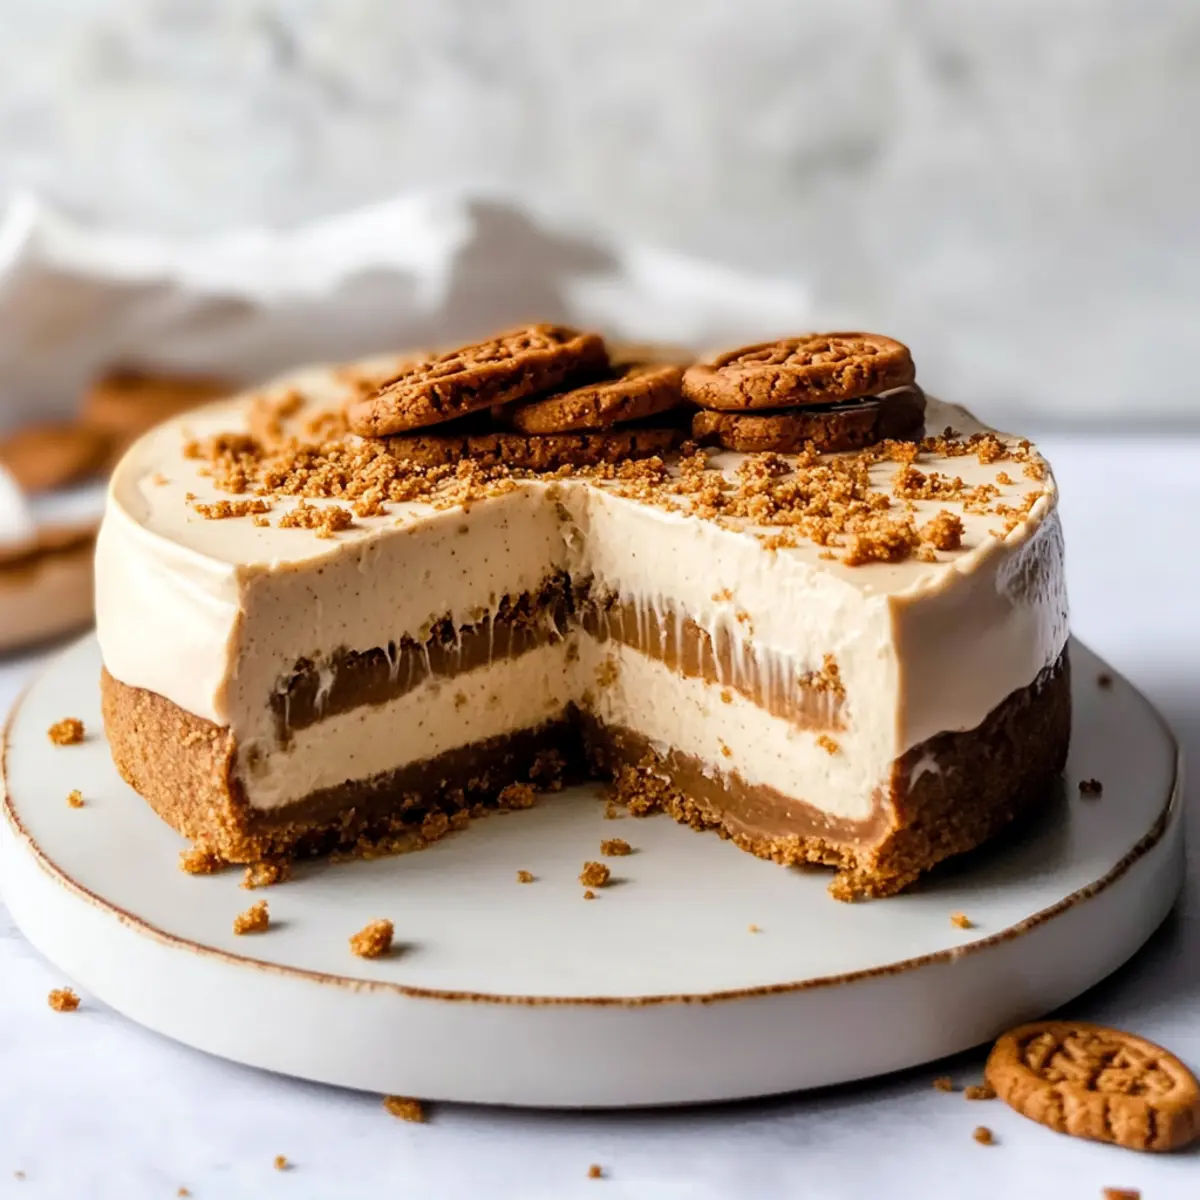
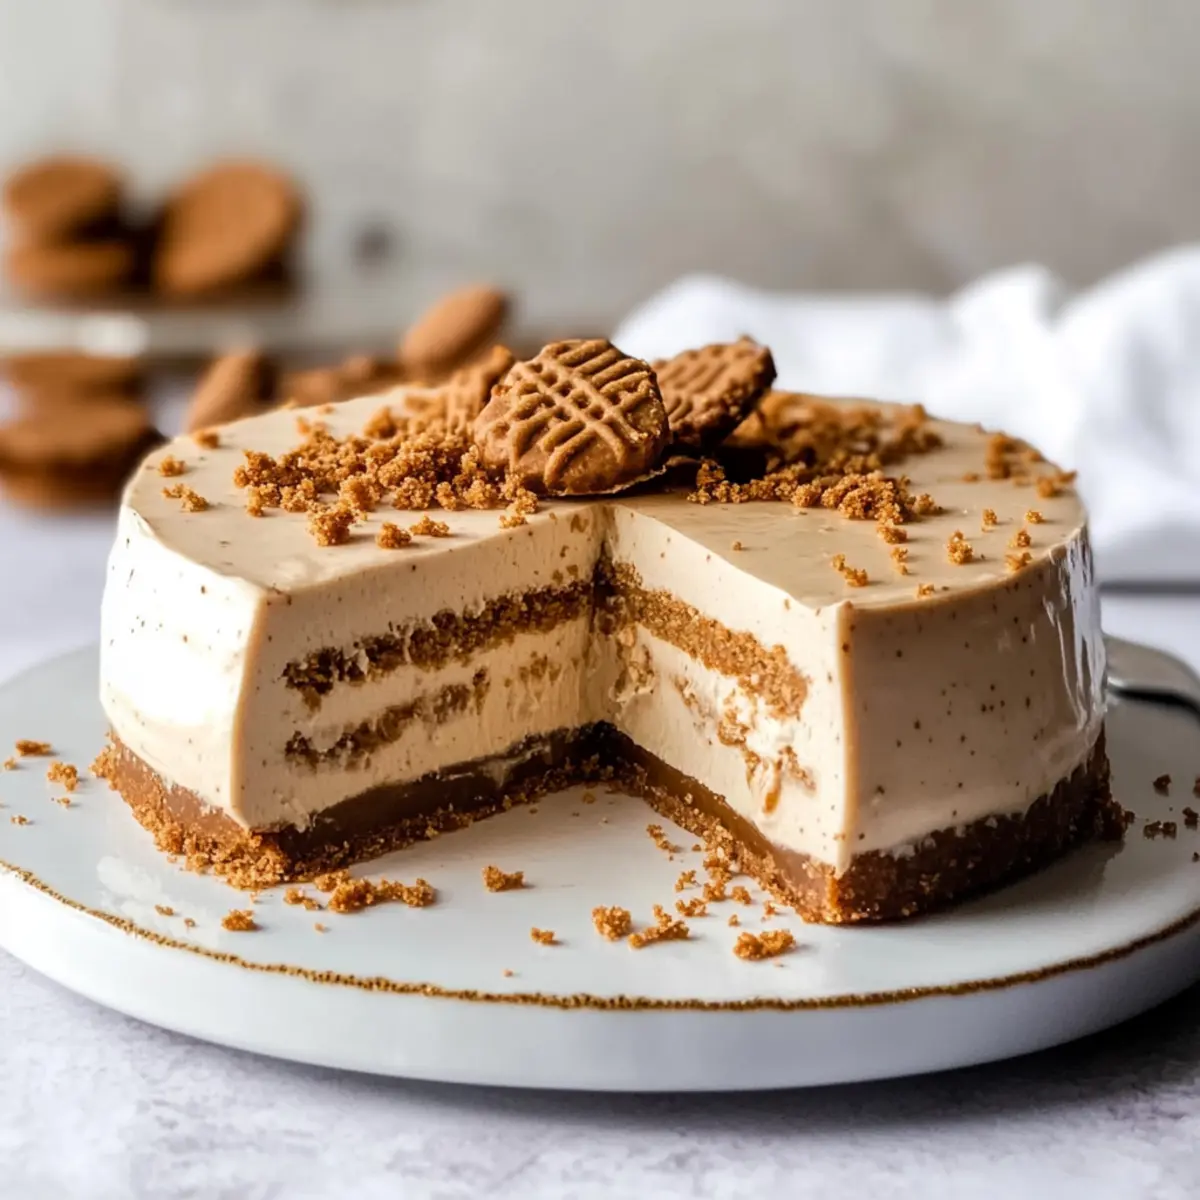
As the sun peeks through the kitchen window, I find myself craving something sweet yet satisfying—something that can transport me to my favorite café without leaving home. Enter the No Bake Biscoff Cheesecake, a delightful dessert that combines the rich, creamy essence of a traditional cheesecake with the unique warmth of Biscoff cookies. Best of all, it’s incredibly easy to make, requiring only one bowl and minimal fuss. You’ll adore how two crunchy layers of cookie crust add a delightful texture, while the airy filling feels like a luxurious cloud of indulgence. Perfect for gatherings or a cozy night in, this cheesecake promises a show-stopping treat that embraces simplicity. Ready to make your taste buds dance with joy? Let’s dive into this effortless recipe!
Why Is This Cheesecake So Extraordinary?
Effortless Preparation: With just one bowl required, you’ll spend less time in the kitchen and more time savoring your delicious creation.
Irresistible Flavor: The combination of Biscoff cookie butter and cream cheese delivers a rich and creamy taste that will have everyone asking for seconds.
Textural Delight: Enjoy a crunchy cookie crust complemented by a light, silky filling that mimics the luxuriousness of classic cheesecakes.
Versatile Indulgence: Feel free to swap in your favorite spreads, like Nutella, for a personalized twist that suits your taste.
Perfect for Any Occasion: Whether it’s a festive gathering or simply a cozy night at home, this cheesecake is guaranteed to impress and satisfy. Don’t forget to check out Strawberry Cheesecake Dip for another delightful treat!
No Bake Biscoff Cheesecake Ingredients
• Here’s what you’ll need for this dreamy dessert:
For the Crust
- Biscoff Cookies – Perfectly crushed for a deliciously unique crust; you can substitute with graham crackers if desired.
- Butter – Unsalted is ideal for a perfectly balanced flavor and to bind the crust together.
For the Filling
- Cream Cheese (block, full-fat) – Essential for that rich, creamy texture; avoid using cream cheese spread for best results.
- Sugar – Granulated sugar adds just the right amount of sweetness to balance the flavors.
- Cookie Butter – Enhances the Biscoff flavor; you can swap it for other nut butters if you prefer (just add more sugar).
- Vanilla Extract – A splash adds depth to the filling; it can be omitted if your cookie butter is already flavored.
- Heavy Cream – Whipped to create a light filling; remember to keep it cold for maximum volume.
For Topping
- Additional Cookie Butter – Melted for an indulgent drizzle that ties everything together; a perfect finishing touch!
Step‑by‑Step Instructions for No Bake Biscoff Cheesecake
Step 1: Prepare the Crust
In a medium mixing bowl, combine the crushed Biscoff cookies with melted unsalted butter, mixing until the crumbs are well-coated and resemble wet sand. This will create a flavorful base for your No Bake Biscoff Cheesecake. Once mixed, reserve about one-third of the mixture for topping, and pack the remaining two-thirds tightly into the bottom of a 9-inch springform pan. Refrigerate for at least 30 minutes to set.
Step 2: Cream the Filling
In a large bowl, beat the block cream cheese and granulated sugar together on medium speed using an electric mixer until smooth and creamy, about 2-3 minutes. This step is essential for achieving that rich, creamy texture that characterizes a great cheesecake. Make sure there are no lumps; the mixture should be luscious and uniform before moving on to the next step.
Step 3: Add Flavor Boosters
Once the cream cheese mixture is smooth, blend in the cookie butter and vanilla extract, mixing until fully incorporated. The cookie butter will enhance the Biscoff flavor in your cheesecake, making it even more indulgent. Keep mixing on low to avoid air bubbles, ensuring everything is well-combined until the mixture looks velvety and has a light hue.
Step 4: Whip the Cream
In a separate bowl, pour in the cold heavy cream. Using a clean whisk or mixer, whip the heavy cream on high speed for about 3-4 minutes until soft peaks form. The cream should look thick and fluffy, adding airiness to your No Bake Biscoff Cheesecake filling. Be cautious not to over-whip, as you want a light mousse texture for that perfect blend of creaminess.
Step 5: Combine Filling Elements
Gently fold the whipped cream into the cream cheese mixture using a spatula. Start with a small scoop of whipped cream to lighten the mixture, then gradually fold in the rest until well combined. The goal is to maintain the airy quality of the whipped cream, which will give the cheesecake its luscious texture. Keep folding until there are no streaks.
Step 6: Layer the Filling
Spoon half of the cheesecake filling over the chilled cookie crust in the springform pan, spreading it out evenly to create a smooth layer. Next, sprinkle the reserved cookie crust mixture on top for added crunch and texture. This layered approach enhances both the visual appeal and the flavor in every bite of your No Bake Biscoff Cheesecake.
Step 7: Final Layer of Cheesecake
Carefully spread the remaining cheesecake filling over the first layer and gently smooth the top to ensure it’s evenly distributed. Try to avoid mixing it with the cookie crust below, keeping that delicious layering intact. This variety in texture will add surprise to each slice served, making it a delightful treat for any occasion.
Step 8: Chill to Set
Cover your cheesecake with plastic wrap and place it in the refrigerator for at least 4 hours, or overnight for best results. Chilling is crucial for setting your No Bake Biscoff Cheesecake and allowing the flavors to meld. Once it’s set, the cheesecake should feel firm to the touch yet slightly jiggle in the center when gently shaken.
Step 9: Prepare for Serving
Before serving, melt additional cookie butter in a microwave-safe bowl for about 20-30 seconds until liquid. Allow it to cool slightly before drizzling over the chilled cheesecake. This luxurious topping brings an extra layer of Biscoff flavor to your dessert, enhancing the overall experience with a delightful finish.
Step 10: Garnish and Serve
Optionally, garnish with a sprinkle of reserved cookie crumbs around the edges of the cheesecake for added visual appeal. Slice into portions and serve chilled for a creamy, indulgent treat. Your No Bake Biscoff Cheesecake is now ready to be enjoyed, offering a harmonious blend of textures and flavors!
How to Store and Freeze No Bake Biscoff Cheesecake
Fridge: Store the cheesecake tightly covered in the refrigerator for up to 4 days. This ensures it stays fresh and maintains its creamy texture.
Freezer: If you want to keep it longer, wrap individual slices in plastic wrap, then place them in an airtight container. It can be frozen for up to 2 months.
Thawing: To enjoy frozen slices, transfer them to the fridge for several hours or overnight to thaw before serving. This preserves the flavor and texture perfectly.
Reheating: No need to reheat—this dessert is best enjoyed chilled straight from the fridge for maximum creaminess!
No Bake Biscoff Cheesecake Variations
Feel free to get creative and personalize this cheesecake to match your cravings or dietary needs!
-
Nut-Free: Swap Biscoff cookie butter for sunflower seed butter for a nut-free version without sacrificing flavor.
-
Vegan: Use vegan cream cheese, coconut cream, and plant-based cookies to create a delicious dairy-free delight. Vegan desserts can be just as indulgent!
-
Low-Sugar: Opt for a sugar substitute like erythritol or stevia to make a low-sugar version that still satisfies your sweet tooth. Just be sure to adjust quantities appropriately.
-
Chocolate Delight: Incorporate melted dark chocolate into the cheesecake filling for a rich, chocolatey twist—perfect for chocolate lovers!
-
Fruit Layer: Add a layer of fresh fruit, like sliced strawberries or blueberries, between the filling layers for a burst of fruity freshness. These bright flavors will make every bite pop!
-
Spiced Twist: Sprinkle in some cinnamon or nutmeg for a warm flavor profile that adds depth to the cheesecake, perfect for cozy gatherings.
-
Extra Crunch: Add crushed nuts to the cookie crust or sprinkle them on top for a delightful crunch that complements the silky filling.
-
Savory Note: Infuse a hint of sea salt or even crushed pretzels for an unexpected sweet-and-salty combo that will have your guests talking.
And if you’re looking for more dessert inspiration, you might enjoy making Strawberry Cheesecake Dip or trying your hand at a Biscoff Cookie Cinnamon recipe!
Make Ahead Options
These No Bake Biscoff Cheesecakes are perfect for meal prep enthusiasts who want to savor time-saving benefits! You can prepare the crust and filling up to 24 hours in advance. For optimal results, mix the crushed Biscoff cookies and melted butter to create the crust, then pack it tightly into the springform pan and refrigerate. Prepare the filling but hold off on layering until the day of serving; refrigerate the cheesecake filling separately to maintain that airy texture. When you’re ready to impress your guests, simply layer the filling over the crust and chill for an additional 4 hours before serving. Enjoy this effortless treat without sacrificing quality!
What to Serve with No Bake Biscoff Cheesecake
Elevate your dessert experience by pairing this dreamy cheesecake with delightful side dishes and accompaniments.
- Fresh Berries: Juicy strawberries, raspberries, or blueberries provide a burst of freshness, beautifully balancing the rich creaminess of the cheesecake.
- Vanilla Ice Cream: A scoop of creamy vanilla ice cream adds a luscious touch that melts beautifully against the cool cheesecake, enhancing your indulgence.
- Caramel Sauce: Drizzling warm caramel over each slice intensifies the flavor and creates a delightful contrast between sweet and rich notes.
- Chocolate Truffles: The decadence of chocolate truffles adds a luxurious finish to your dessert spread, with each bite complementing the silky texture of the cheesecake.
- Espresso or Coffee: The robust flavors of espresso or a rich cup of coffee offer a perfect pairing, cutting through the richness while elevating the sweetness.
- Whipped Cream: Top with a dollop of freshly whipped cream for an added layer of lightness, offering a delightful texture that harmonizes with the cheesecake’s creaminess.
- Coconut Macaroons: Chewy, slightly sweet coconut macaroons make for an unexpected but delicious accompaniment, introducing another flavor dimension to your dessert experience.
- Mint Tea: A refreshing cup of herbal mint tea provides a soothing finish after the sweetness, making it an excellent complement for the cheesecake.
- Chocolate-Covered Strawberries: These sweet, fruity treats add both elegance and a tangy contrast to the rich flavors of the cheesecake, enhancing your dessert experience.
Expert Tips for No Bake Biscoff Cheesecake
-
Use Block Cream Cheese: Always choose block cream cheese, as spreads won’t set properly, leading to a runny filling.
-
Chill Your Heavy Cream: Keep your heavy cream cold until you whisk it; this will help you achieve maximum volume for a light and airy cheesecake.
-
Avoid Overmixing: When folding in the whipped cream, be gentle. Overmixing can deflate the airiness, resulting in a denser texture.
-
Let It Set: Be patient and chill your cheesecake for at least 4 hours, or overnight. This ensures that it firms up and flavors develop fully.
-
Creative Toppings: Feel free to drizzle melted Biscoff cookie butter or sprinkle extra cookie crumbs on top for an additional layer of deliciousness.
-
Keep It Stored: If you have leftovers, cover tightly and store in the fridge for 3 to 4 days for the best taste and freshness.
No Bake Biscoff Cheesecake Recipe FAQs
What type of Biscoff cookies should I use?
Use regular Biscoff cookies for the crust, crushed into fine crumbs. If you can’t find them, graham crackers or another cookie can work as a tasty alternative.
How long can I store my No Bake Biscoff Cheesecake in the fridge?
You can store the cheesecake tightly covered in the refrigerator for up to 4 days. It’s best to keep it wrapped to maintain its creamy texture and flavor.
Can I freeze No Bake Biscoff Cheesecake? How?
Absolutely! To freeze, wrap individual slices in plastic wrap and place them in an airtight container. It can be stored in the freezer for up to 2 months. When you’re ready to enjoy, transfer the slices to the fridge to thaw for several hours or overnight.
Why is my cheesecake filling runny?
If your filling is runny, it’s often due to using cream cheese spread instead of the block kind. Only block cream cheese creates that desired thick, creamy consistency. Additionally, ensure you chill the cheesecake for at least 4 hours or overnight to set properly.
Can I modify this recipe for dietary restrictions?
Certainly! For gluten-free options, use gluten-free Biscoff cookies or a suitable alternative for the crust. If you have dairy concerns, try using dairy-free cream cheese and heavy cream for the filling. Just remember that this might affect the texture slightly.
Is this cheesecake safe for pets?
No, the ingredients such as sugar and cream cheese are not recommended for pets, particularly dogs. To keep them safe, enjoy your No Bake Biscoff Cheesecake as a delightful treat just for yourself!
Indulge in Creamy No Bake Biscoff Cheesecake Bliss
Ingredients
Equipment
Method
- Combine the crushed Biscoff cookies with melted unsalted butter in a bowl until well-coated. Reserve one-third for topping and pack the remainder into a 9-inch springform pan. Refrigerate for 30 minutes.
- In a separate bowl, beat the cream cheese and granulated sugar together until smooth and creamy, about 2-3 minutes.
- Blend in the cookie butter and vanilla extract until fully incorporated, ensuring a smooth mixture.
- Whip the cold heavy cream on high speed until soft peaks form, about 3-4 minutes. Be careful not to over-whip.
- Gently fold the whipped cream into the cream cheese mixture until fully combined and no streaks remain.
- Spread half of the filling over the chilled crust and sprinkle reserved cookie crumbs on top.
- Add the remaining filling and smooth the top. Avoid mixing with the crust below.
- Cover with plastic wrap and chill for at least 4 hours, or overnight for best results.
- Melt additional cookie butter and drizzle over the cheesecake before serving.
- Optionally garnish with extra cookie crumbs around the edges. Slice and serve chilled.
Leave a Reply